
How to Overclock Your GPU
Overclocking your graphics card can boost the performance of your computer at a significant rate. The truth is that the GPU is able to perform better than what your computer manufacturer set it to. The reason for the limitation is to ensure that your machine is stable the time you purchase it. It is possible and easy to boost your graphics card performance regardless of the manufacturer or computer model.
The various computer operating systems support GPU overclocking to meet your needs. You, however, need to understand that every graphics card is distinct from the rest. The results you get from your machine may differ from your friend’s. This article will guide you on the step-by-step process of overclocking your GPU on your computer with your operating system.
How GPU Overclocking Works
As mentioned earlier, your GPU was set to run at a given speed when you were buying your computer. Overclocking means that you are going to alter the base clock that the card was set to run it so that it can process at a higher speed.
GPU overclocking makes your machine to consume more power. As a result, you may experience some increase in the temperature during operation and increased fan speeds and noise. This process may also make your laptop to drain the battery faster.
It is, therefore, advisable to make sure that you adjust the speeds and balance with the power consumption and heating. Triggering the GPU to process at very high speeds may cause your computer to be unstable due to overheating. You may want to overclock your GPU if you are a heavy gamer or you use it for HD movies and other resource-intensive features.
Overclocking Your GPU on Windows PC
The first thing to note when overclocking your graphics card on Windows is that you can step the speeds down in case it goes beyond a safe limit. You are advised to increase the speeds slowly to avoid bumping into glitches. When you hit a level that seems rather too high, you can then lower your input to stabilize your machine.
Necessary Tools for Overclocking on Windows
There are two essential pieces of software that will help you in the overclocking process. The first software will help you to set new speeds for your system GPU while the second one is essential for testing the stability of the system after writing the new values to your system.
The MSI Afterburner is the most widely used software for overclocking your GPU. It offers you complete control over your graphics card so that you can set it up to work perfectly as per your needs. The software is compatible with all graphics cards models and it comes free of charge.
The Heaven Benchmark is the necessary software that you will use to stress test your system after a successful overclock. Apart from testing your video card, the Heaven Benchmark also tests your system power supply as well as the cooling system for optimal performance feedback.
Steps to Follow for a Successful Overclocking on Windows PC
After installing the above-mentioned pieces of software, you are now ready to start the process of graphics card overclocking on Windows PC. The first step is to launch the Afterburner application from MSI. Pay attention to the details in the numbered boxes in the image.
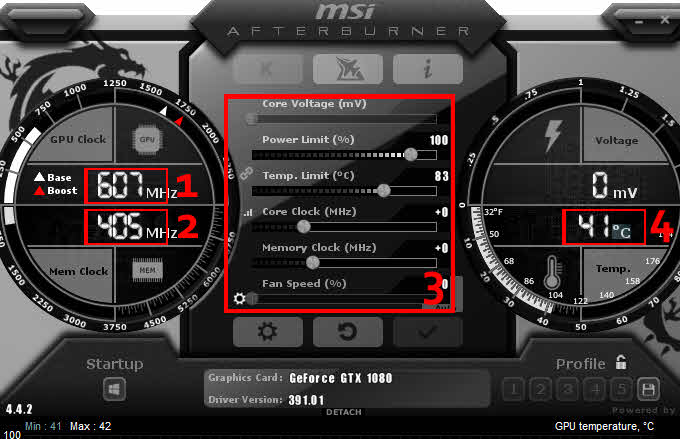
- Your core clock. This shows the speed of your GPU that you will need to overclock. As you fine-tune the settings, you will notice a change in this number before you apply.
- System memory clock speed. This is another element you can overclock on your PC. But before you change it, apply changes to the core clock and test the results.
- This control panel allows you to carry out the various changes in your system. You can use it to modify the core clock, the fan speed, as well as the memory clock.
- The GPU temperature meter indicates the current temperature state of your graphics card. You will notice changes when the card starts to process at a higher speed after overclocking.
Here are the steps you will need to follow when overclocking your GPU:
1. Test Your System
Before you start overclocking your GPU, you need to run a benchmark test and record some results. You will check these against the results after a successful overclock to see whether there is an improvement. It also helps you to identify the correct values to use to avoid overloading the computer.
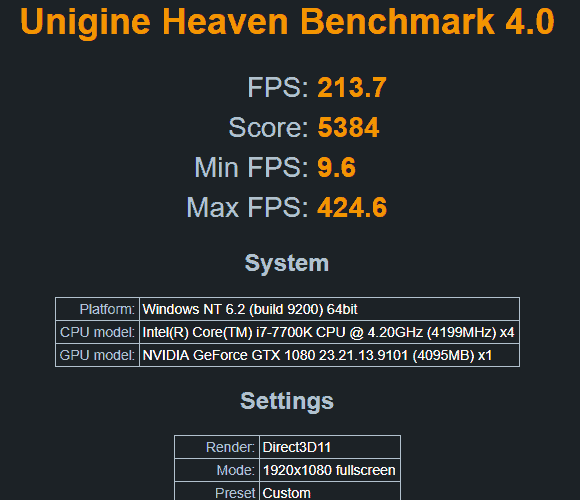
To begin the testing process, fire up the Heaven Benchmark tool that you installed earlier. You only need to click the “RUN” button upon the launching of the software. You will see a 3D figure on the application window. Check the top left of the window and click on the “Benchmark” button to start the process.

During the benchmarking process, the software will display various test results like the frames, temperature, memory clock, and the graphics clock. Allow it to finish all the 26 tests and record the results. The main items to take note of are the temperature during the test, the FPS after the test, and the score.
2. Set Up the Software for Overclocking
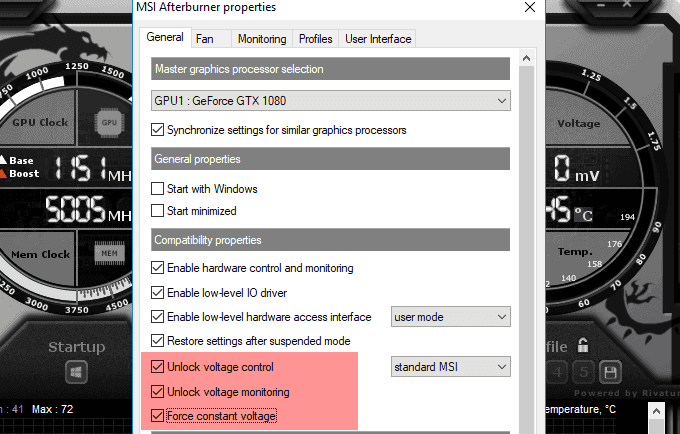
After getting the basic settings for your GPU, it is time to carry out the overclocking. But you have to get the software ready for the task. You will need to run the MSI Afterburner app and click on the “Settings” button. It will open a window for the configurations. Under the “General” tab, check the boxes that say “Unlock Voltage Control”, “Force Constant Voltage”, and the “Unlock Voltage Monitoring”, and save the changes. You will get a prompt to restart the machine. Click “OK” to continue (but be sure to return to this page to continue).
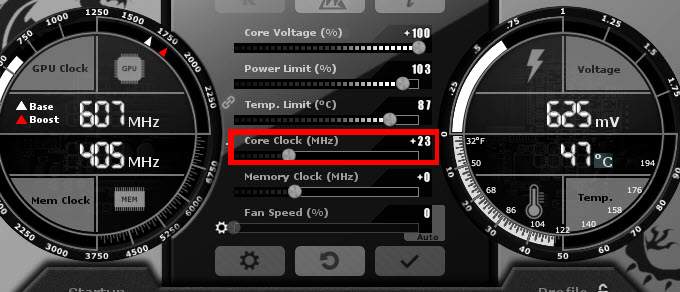
After a successful reboot, you need to relaunch the MSI Afterburner software to continue. This time, you should adjust the temperature limit to the maximum at which you would like the machine to run. See the image below. As you increase the temperature limit, the power limit will also go up.
Now slide the core voltage to the right. It will show you the percentage you can overclock your card to. This percentage is dependent on your graphics card and will differ from that of another computer. Click the save button (check sign) to keep the edits.
3. Overclock Your GPU
After saving the desired limits, it is now time to adjust the speed of your graphics card. Add a value to the default and save the changes. Run the Heaven Benchmark to test the results. Carry out the benchmarking as you had previously done before altering anything, and record the results. Compare to see if there is any improvement.
Repeat the procedure until you attain a maximum desirable overclocking value for optimal performance of your PC. You realize that each time you increase the core clock, the temperature also rises. You will need the temperature results to guide you on how much you can overclock your GPU without causing problems with your PC. Did you overdo it? No worry, simply reduce the core clock value and save. You are done!
Failsafe Shortcut
When saving your configurations, you will be asked to choose a save profile. You can create up to 6 profiles for a one-click setting loading for the various configurations you have for your needs. Your games may need different settings to work properly. In case everything fails, you can simply click the “Reload” button to reset the GPU clock to the default.
Overclocking a Macintosh GPU
Macintosh computers come with fast processors and great performance. There are, however, two scenarios when you want to talk about overclocking on the system. If the system is still running on the Apple macOS, then you do not need to overclock the GPU. Your system is already designed to run at optimal speeds without glitches. The process may also inhibit your access to the OS because you will need to do a flush. It is even a complicated process that will not help you as per the purpose of this article.
If, however, you have installed Windows on your Mac, you will then need to overclock the GPU from within Windows for optimal performance. Simply follow the above steps for overclocking on Windows PC. After overclocking, you can experience the changes when you are logged in to Windows. When you boot back to macOS (assuming you have multiboot on the device), the system does not change.
If you are running a Linux OS on your Mac, you will need to follow the instructions below for GPU overclocking in Linux. This will improve the performance when you are logged in to your preferred Linux OS on your Mac.
Overclocking Your GPU on Linux Machines
Linux is an open source software and comes in numerous distros and flavors for various purposes. AMDGPU is a package you will need for overclocking your AMD GPU in a Linux machine.
If you are using an AMD graphics card, then you already have the necessary software drivers to overclock your GPU. The only problem is that the process is not that straightforward as to slide the settings with a GUI. There is no GUI yet for monitoring and controlling AMD drivers on the Linux system.
To successfully overclock your AMD GPU on Linux, you will need to manually edit some system settings by altering values in specific files – thanks to the open source code. All you need is an updated system and administrator (root) privileges to manipulate the system files. Sudo works perfectly for Debian based distros. For this tutorial, we will use Ubuntu (a stable Debian derivative) as an example.
Prepare the Software
If your system is supported by the AMD proprietary software, you can download the relevant drivers from the AMD website. The open source drivers are already installed by default through the kernel. You may want to upgrade the drivers, but it is not essential for the overclocking process. Please refer to your distro for instructions on how to update/upgrade the graphics drivers.
The next step is to get a monitoring tool to check and ensure that your GPU temperature does not exceed the recommended when you start to overclock the GPU. For this purpose, you need a sensor software to display the figures of the actual values.
To install the sensor on your Ubuntu machine, use the code:
sudo apt-get install lm-sensors
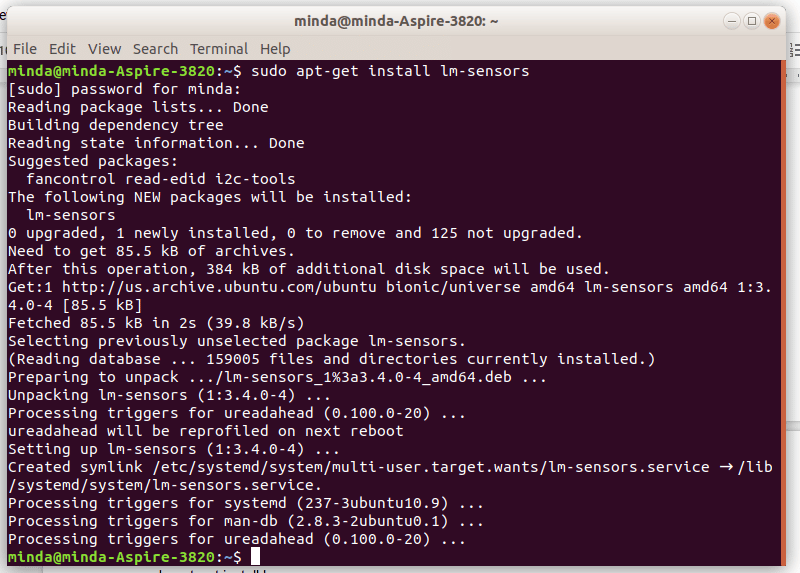
Enter your password to gain root privileges. The installation will complete successfully. You now need to scan your system with the sensor to see your current operational values.
sudo sensors-detect
You may need to grant permission when prompted to continue.
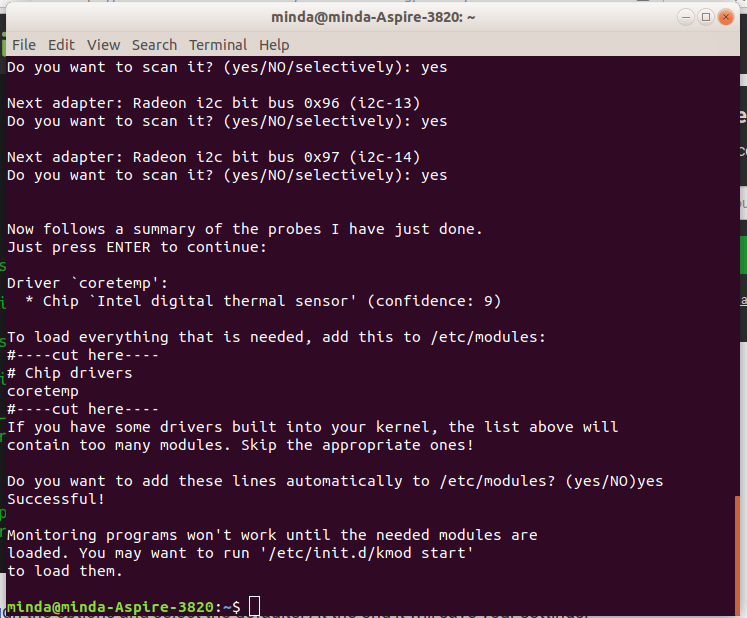
After saving your configurations, you will need to restart the service. Then you can run the “sensors” command on the terminal to see the current temperature and the maximum you should allow. The “watch sensors” command opens a real-time monitoring window that shows the current state of your system. This is beneficial to help you see the changes as you overclock your GPU.
Overclock Your AMD GPU
The AMD overclocking values are set as percentages. The default setting is 0. This means that if you add a value of 10, your GPU will increase the process speed by 10% of the original speed. The file to write the value to is the “/sys/class/drm/card0/device/pp_sclk_od”.
sudo echo "10" > /sys/class/drm/card0/device/pp_sclk_od
You can increase the value slowly while watching the temperature. You can achieve this by opening a new terminal window and type:
watch cat /sys/kernel/debug/dri/0/amdgpu_pm_info.
Open that resource-intensive game to see how your GPU behaves. The terminal output will show you the temperatures.
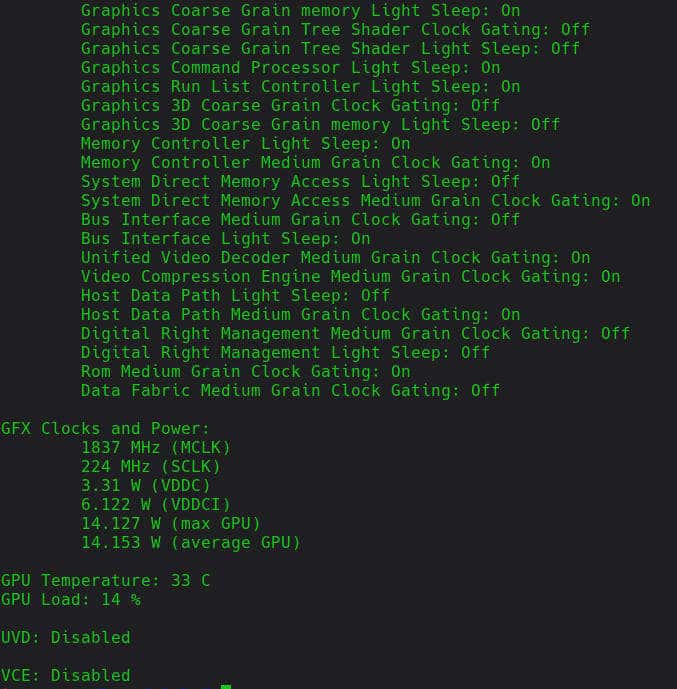
You can increase the overclock if the system has not reached the maximum temperature. If it seems going beyond the recommended limits, you need to dial it back.