How To Setup A Internet Radio Station
We use our computers, including tablets and smartphones, for numerous functions. But have you ever wondered how much more you can achieve with your gadget? One thing I thought you should know is that you can share anything audio via the internet and make it available as a live stream to listeners globally.
By “anything”, I mean whatever you want to inform people. It can be news updates and information, tips and tricks, or anything you have expert knowledge in. In short, I am saying that you can start your own radio station that anybody can listen online.
Do you remember the last time you tried to get featured in a show but the radio director turned your request down? Repay by starting your own and broadcast yourself unlimitedly. In this post, we guide you stepwise on how to setup a internet radio station without the need for an expert IT consultant or technician. You can do everything right from your house or work desk.
I assume that you already know what topics you want to cover on your radio station. With proper planning and staff (broadcasting assistants), you can brand your radio and grow your audience. Once you get sufficient following, you can start commercializing your station.
Here are the steps you need to deploy to start your own internet radio and capitalize on it for returns.
1. Get Accustomed with the Copyrights Laws

Before you start airing music on your intended radio station, you need to know what the governing law in your country or territory states on such material. It is ideal to go through the sections of the constitution or the gazetted law regarding copyright infringement, especially concerning intellectual property.
In case you need licensing, you need to seek it before you launch your station. Buy a license that allows you to play music any time of the day, any day, for as long as it is acceptable. Some territories may require that you renew your license after a certain period of time.
Depending on where you come from, you may not need a license to air your own drafted programs and owned music. But a business license may be necessary. You may want to get more information from your local authority offices.
2. Buy the Necessary Hardware
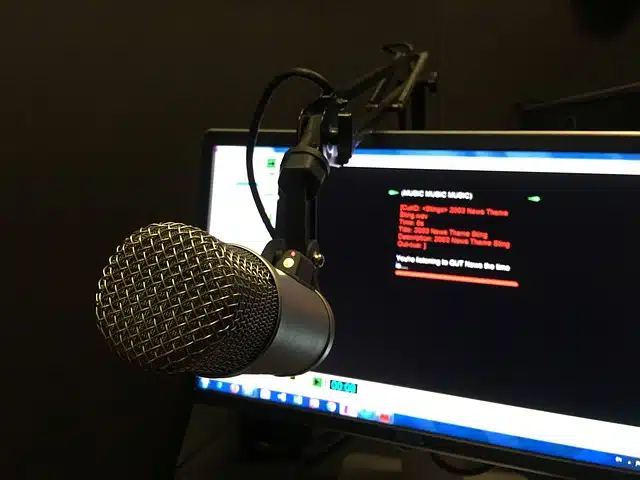
The tools and equipment you need for running a radio station are not as expensive as you may think. As a basic start, you may not need more than your computer, headphones, and a suitable microphone. You need, however, to choose a high-quality laptop for streaming your station. It should not be one that overheats after playing two music files (mine does overheat and powers off when playing a video on VLC for Ubuntu).
Some headphones come with in-built microphones. But if you get a desktop microphone, it will be better off when doing a live broadcast on your station. There is no technical knowledge required to set up your hardware for streaming. Just plug your headphones and mic in the jacks as you do when you Skype your friend.
3. Install the Streaming Software on Your Computer
We already informed you that setting up a radio station is very simple. To start broadcasting live from your computer, you need the tools you use for playing media on your laptop – VLC media player from VideoLAN. This is regardless of the operating system you are running.
The reason I prefer VLC for all your internet radio and streaming needs is that apart from streaming your saved audio library, it can capture your input devices (microphones) for a live performance. It can as well broadcast your screen, but, for the purpose of this article, we will only stick to audio.
4. Get Unlimited Internet Subscription
Airing your program online nonstop required uninterrupted connection to the internet. In developed countries, the internet is not a problem. But if you come from developing countries, you realize that internet connectivity is yet to thrive. Many ISP companies put a limit on the usage of your data plan.
Mobile data is well spread in many places, but their limits cannot allow you to stream content unlimitedly. On the other hand, the other wireless and wired connections seem to work only in big cities or within the town. Depending on your location, you may need to negotiate with your ISP to offer you a data plan that allows you to stream your content without interruptions.
In case you cannot come across an unlimited data plan, you may want to do some math. Calculate the bitrate of the audio you will stream and multiply it with the duration you should renew the data. For instance, audio streaming at 192 kbps will use (192/8)x60 = 1.44 Mb per minute.
Your calculations should, however, include more because of data loss and usage by other apps on your PC. You also need a backup internet supply as much as you need a power source backup. You do not want to go offline due to interrupted services once you have gained an audience.
5. Get a Server for Your Radio
To avoid the inconveniences of having to set up your machine to be the transmitter, you need to set up your radio server online. There are two avenues you may want to follow when you are ready to set up your radio server. The first option is to use any of the many available radio servers where you sign up and choose your plan. Another one is building your dedicated server from scratch.
Each of the radio servers has distinct settings and customizations. You can ask the respective support team for assistance on how to control your radio and how to do stuff. The customer service executive is readily available to offer you with all the detailed support you need.
If you want to build a dedicated server, you will want to purchase a VPS host. A VPS can host anything from websites, emails, radio, files archive, etc. But the setup for each is different. We will look at how to get a radio server to work on your VPS so that your listeners get the opportunity to follow your broadcast anytime.
5.1 Choose Your VPS and OS
From the many hosting companies that offer VPS hosting, you can choose if you want Windows or Linux for your server. For a majority of us, Linux servers are ideal for internet tasks, unless we need to use software that is only available for Windows. You may also want to choose between managed VPS, semi-managed, or unmanaged.
In most cases, when you purchase a VPS, your preferred OS will be installed. CentOS is common due to its stability when hosting heavy programs and websites. For my local machine, I like Ubuntu. But regardless of your choice, all we need is to have the radio streaming server software to run.
5.2 Install Icecast on Your VPS
Icecast is a media streaming software for your radio server. It runs on both Windows and Linux. The software allows you to set up a server that streams multiple contents in various quality for your listeners. You have to specify the “mount points” when setting up your server so that the users can listen to a given stream at a time.
To install Icecast on Windows server, you need to connect to your server through the RDP protocol from your PC. On your server, navigate to the Icecast downloads page and download the Windows binary (executable file). You can install the file the same way you install software on your PC.
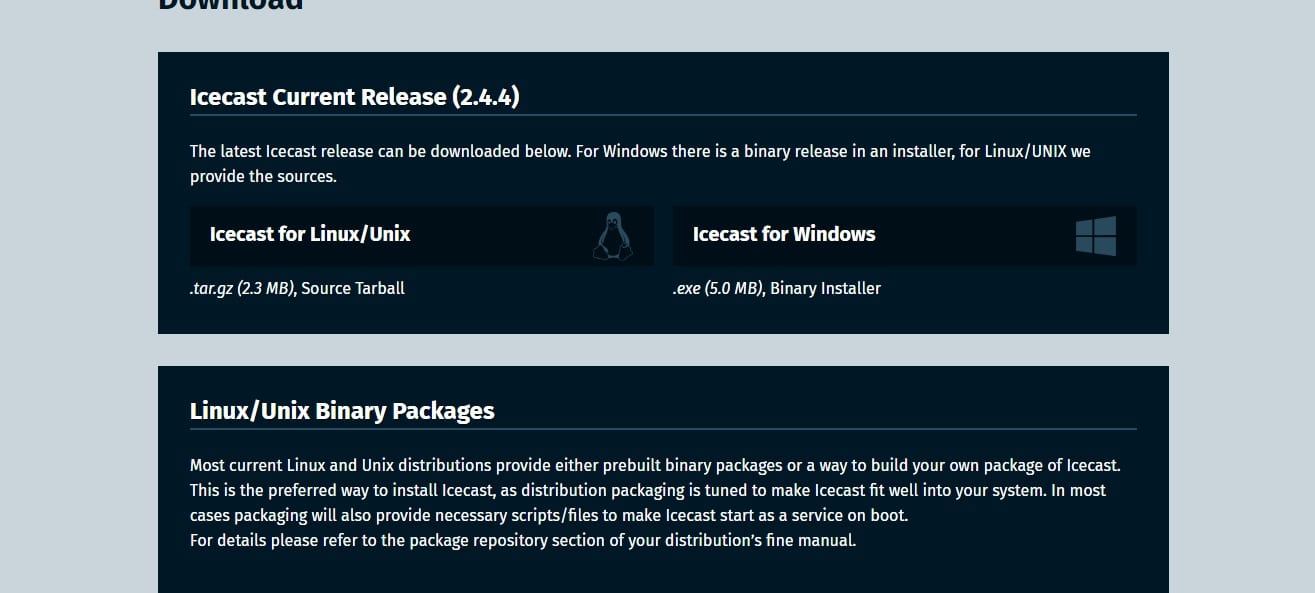
On Linux, installation of software takes some steps. The installation procedure and commands you use depend on your OS distro. You can find all the downloads here. Installation on Ubuntu servers is easy. Ensure you are connected to your server via SSH. Log in as “root” or a user with “sudo” privileges.
On the terminal, type:
sudo apt update
The command above allows you to update the software repositories. You may have to enter your password to access the sudo command. Once the update is complete, run the code:
sudo apt install icecast2
This command will install the Icecast radio streaming server software and all dependencies (whenever necessary). Your server is now ready to start streaming. But a few setup tweaks are essential to complete the setup.
6. Set Up the Server
After installing your server, you now need to configure it to start streaming audio from your computer to the listeners. The configuration is about the hostname (computer name, normally the domain name or IP address), ports that the server will run on, and the mount points. Icecast has published the official setup instructions you can use. You can check out their complete documentation pages for your specific Icecast version.
During the setup, you are also required to specify the username and password you will use to log in when streaming the content online. The admin interface also has login credentials, and you may want to modify them as well.
7. Start Broadcasting
The very first step to streaming your radio online is to run the VLC application on your local computer. Whether you are on Windows, Mac, or Linux, the steps are the same from here forth. The app allows you to broadcast your locally saved files as well as your mic for live sessions.
7.1 Media Streaming
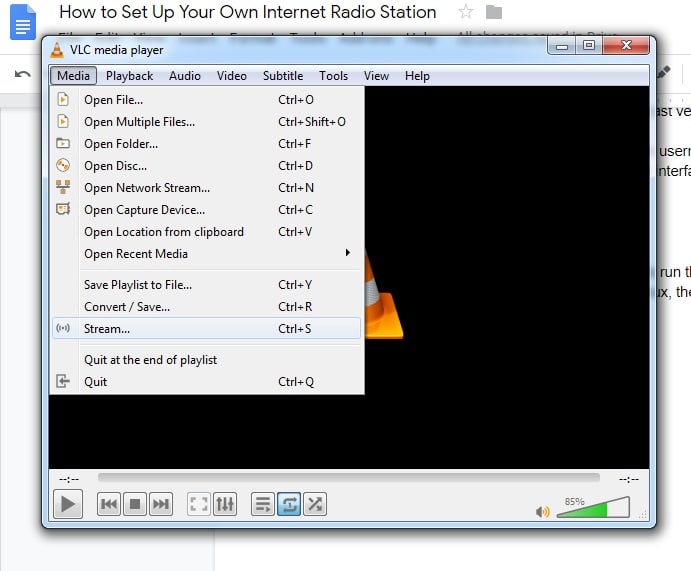
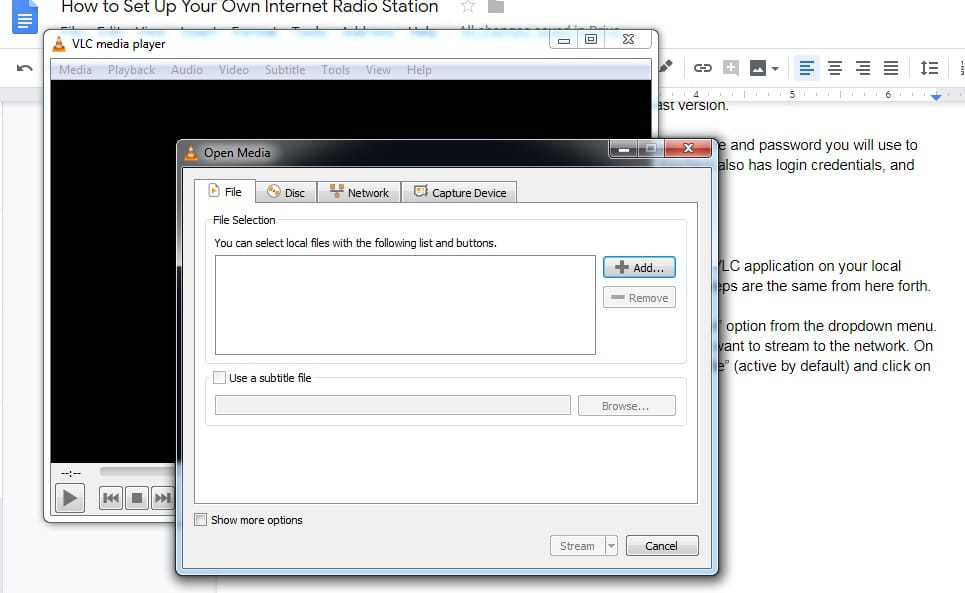
On the toolbar menu, click on “media” and click on the “stream” option from the dropdown menu. This will open a window that allows you to select the files you want to stream to the network. On the “Open media” pop up window, click on the first tab titled “file” (active by default) and click on the “Add” button.
It will allow you to choose (audio) files from your computer to stream. Now click on the “Stream” button at the bottom of the app window.
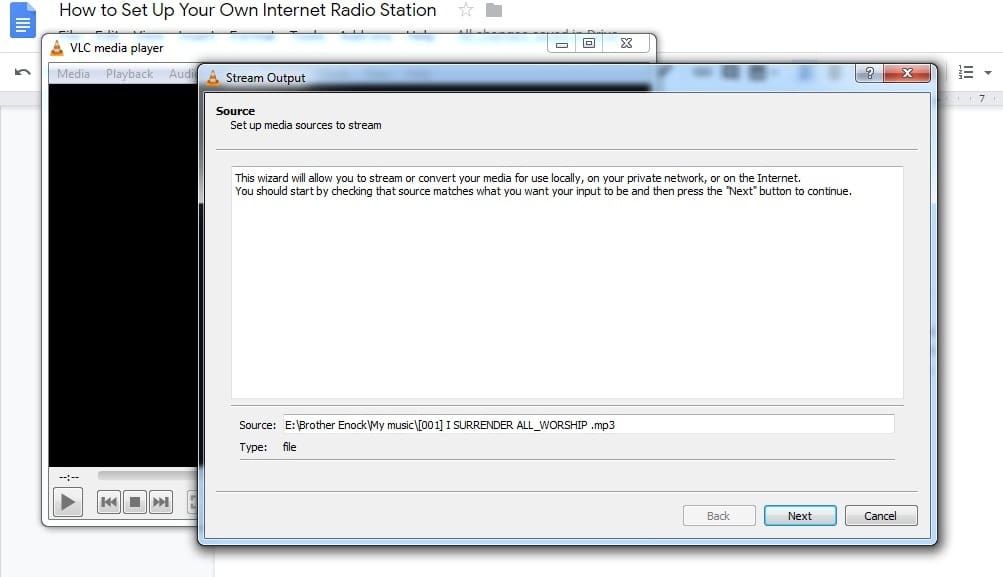
VLC will take you through the streaming wizard. On the wizard page, click on the “next” button. You will come to a page asking you to set up a new destination.
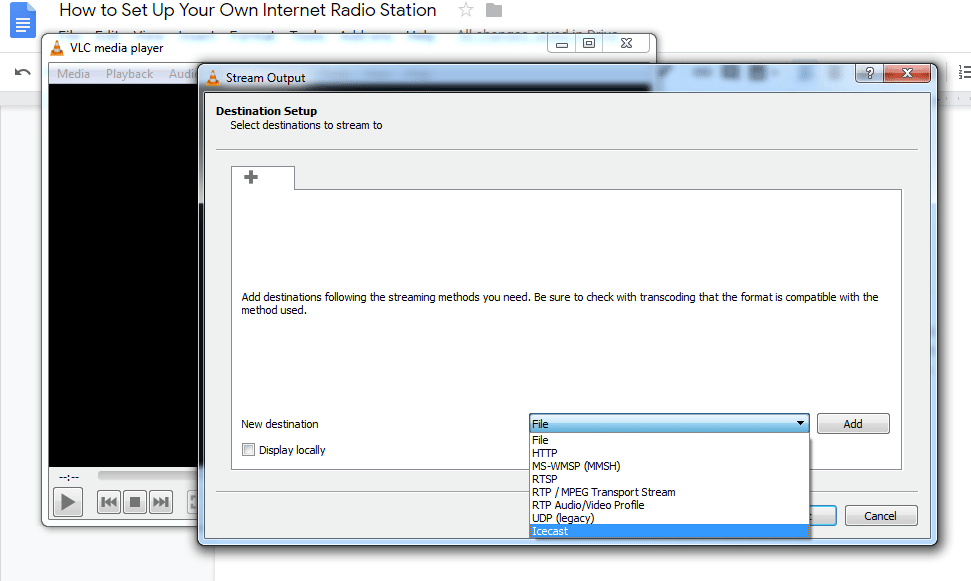
Click on the dropdown menu titled “file” and select the “Icecast” option. Click on the “Add” button.
Now you need to enter your Icecast configuration credentials. Do you remember the server name, port, and source username and password? These are the details you need here.

Click the “next” button. On the next page, choose your preferred transcoding option. Remember that you should have the option enabled on your Icecast server. The dropdown allows you to choose the type of audio to stream (video options available when you are doing live video streams).
![]()
Click the “next” button once again. Then click the “stream button to save your input Icecast settings to start broadcasting. By this time, your radio should go live. Test it out by opening a web browser or a media player app that supports network stream. VLC is a good option for both desktop and mobile. Enter your domain name, port, and the mount point file name, e.g. https://myradiostreamdomain.org:8000/audiooutput.mp3 on your web browser or media player.
7.2 Live Broadcast
When you want to hold live performances in your “studio”, you need to use the “Capture Device” menu when choosing the input. You can use the shortcut CTRL+C to reach the menu. But if you use the shortcut, remember to open the menu titled “play” and choose “stream” instead.
Change the video device to “none” because you are only broadcasting the audio. Leave your audio device as “default” or choose from the dropdown if you have multiple microphones. All the other steps are the same as broadcasting the audio files above.
Summing Up
This is a basic tutorial on starting and broadcasting on your own internet radio station. Something to remember is that sometimes you may want to be speaking while playing audio in the background. In this case, you will need to run two instances of VLC. It also makes it easier to switch back and forth. Ensure the feature is not disabled on the VLC preferences.