Windows is still the most widely used operating system powering PCs. Although other OSs have gained more popularity over the years, Windows continues to remain dominant by far. Windows machines use a database mechanism called Windows Registry as the storage for most settings on the computer.
In the registry, you can find users’ information, application settings, Windows services, device drivers, kernel settings, and much more. However, it is not a straightforward tool you can play around with. A corrupt or damaged registry could cause system instability, program incompatibility, or, in the worst cases, a failed system that cannot function.
Editing the registry can help you enhance certain features on your Windows computer. An example is when you want to force Windows to use the UTC timezone. But doing it inappropriately can wreck your machine and render it useless – unless you reinstall the OS. To avoid all the unnecessary headaches, you should back up the registry to a safe place (drive or cloud storage) before you edit.
A malware infection can also cause a system problem. You may need to restore your registry to get your computer to function normally. There is always a reason as to why you need to back up your registry often. In this post, you will learn the reasons for creating registry backups and the appropriate methods for performing the registry backups.
Regardless of what causes the changes in your system, it is ideal to arm yourself with an up-to-date registry. So, ensure that you perform backups regularly to avoid losing your system tools configurations when you want to restore your machine.
Why You Need Registry Backups
Both intentional and unintentional activities on your computer can cause undesirable changes that can affect the stability or performance of your system. Here are some of the reasons or scenarios when you need to create backups of your PC’s Windows registry.
1. Installing or Uninstalling of Heavy Applications or Software
Heavy PC gamers install many applications. The same case applies for media production PC users and those who stay on the internet for long hours. Some of the applications we run on the PCs require a lot of PC resources to perform. Sometimes, they take a long time to install, update or uninstall.
Sometimes when the Windows update does not work properly, you may resolve to install updates manually. The process, however, requires that you download huge files and run the installer on your PC. Windows updates may require that you reboot your system several times before it completes.
A sad case is when you reboot the PC and the updates cannot complete. In such cases, the partial update has made irreversible changes to your Windows registry. Such changes can hinder further updates on your system, and you may remain stuck with a non-performing computer. It happened to me, the result was a PC that cannot update the Software.
As a precaution, you need to back up the registry on your machine before performing such updates and software installations. If anything breaks, you can restore the previously working registry and your system will get back to normal.
2. Making Manual System and Network Customizations
After you have installed windows on your computer, you will want to make several changes to your computer to meet your needs. Such customizations vary from Windows settings, applications, services, and drivers. Updating everything on your machine will enhance your PC’s usability and your experience.
Most of the customizations we do on computers are necessary for the computer to work For instance, the various networking adapters, graphic cards, and sound cards need drivers to function. So, the initial customizations on a Windows computer are always heavy.
However, you may want to do other system settings changes along the way when you are using Windows. While the system is still functional, it is appropriate to do a registry backup to secure your system settings, applications, and features.
3. When Doing a Manual Edit on the Registry
Apart from system settings and application updates, you can edit your Windows registry directly to customize various aspects and functions of your computer. Editing the registry is a necessary step when you want to add a feature or update that is not available from the Windows settings GUI.
While editing your Windows registry should be completely safe, you need to be careful not to change some aspects that could make the computer OS unstable or nonfunctional. The changes you make on the registry are permanent. Without an “Undo” button, you can wreck your system not to function again by making changes to the wrong key or saving an invalid value.
As a rule of thumb, the most secure way to keep your computer operational when editing the registry is by backing up the registry before doing any modifications. Any time you think about changing system settings through the registry, back up a copy of the current registry and save it in a secure location before proceeding.
4. Repairing with a Registry Cleaner
Computer registry cleaners are essential must-have pieces of software that all Windows users need. CCleaner is one of the best cleaners you can use to clean up your registry of unwanted stuff to make your PC stable and secure.
With a registry cleaner, you can get rid of unwanted information from the system registry and buggy settings to make the database efficient for a faster PC. A registry cleaner is also ideal to repair your system after a malware or virus attack.
Even after you have removed the malware from your PC, you will want to clean the registry to ensure it did not leave loopholes for stealing your information. Some of the apps that store information in the registry may also pose a threat to PC owners.
You do not want personal data to get to the wrong hands because of using third-party apps on your computer. A registry cleaner will help you with that.
Although registry cleaners are safe to run on your computer, you cannot be sure when the system will halt midway and cause trouble on the database. It is ideal to do a backup before you start cleaning up your system registry. That is extremely important.
How to Back Up Your Windows Registry
There are two ways to make a registry backup on all versions of Windows. However, on Windows 10, you can schedule automated backups of your registry to ensure that your systems are secure all the time. Forgetting should not be an issue anymore.
Here are the ways you can perform manual registry backups.
1. Create a System Restore Point
Regardless of the version of Windows you are using (from Windows XP to Windows 10), system restore points help to store the configuration of your system before you make major modifications on your computer. In most cases, the restore point automatically creates backups when installing or uninstalling software and making updates on your system.
However, this is not always the case because some manual updates do not inform the system that your system is changing so that it can create a backup. For this reason, you need to make the backup manually. Sometimes, the automatic restore point creation might not take place even when you are updating software and services. To stay on the safe side, it is recommended to create manual restore points.
The process of creating a restore point is the same on both Windows 7 and Windows 10. However, on Windows 10, the feature is disabled by default. You have to enable it before you begin saving snapshots of your system.
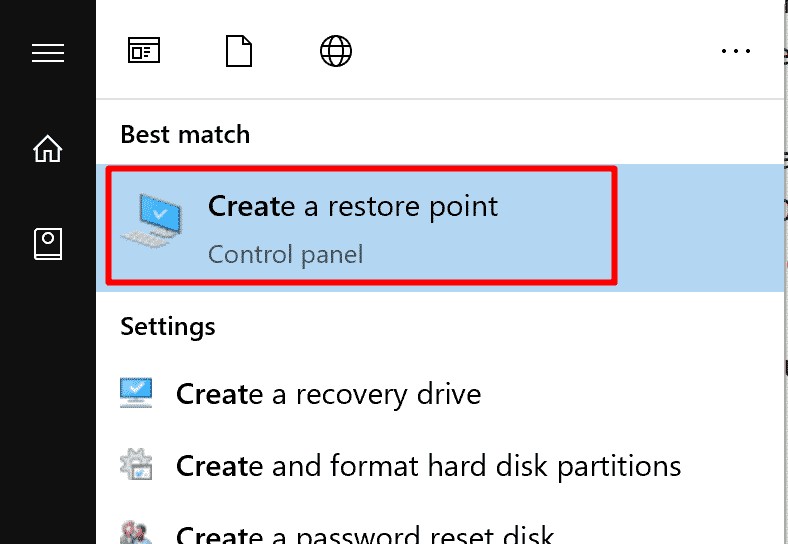
To enable restore point functionality on Windows 10, open the Start menu and search for “Create a Restore Point” and click on the System Properties result.
Once the app launches, it will load the “System Protection” tab. Under the “Protection Settings” menu, click on the drive you have installed Windows 10. This is usually Drive C, and it is labeled “(System)”.
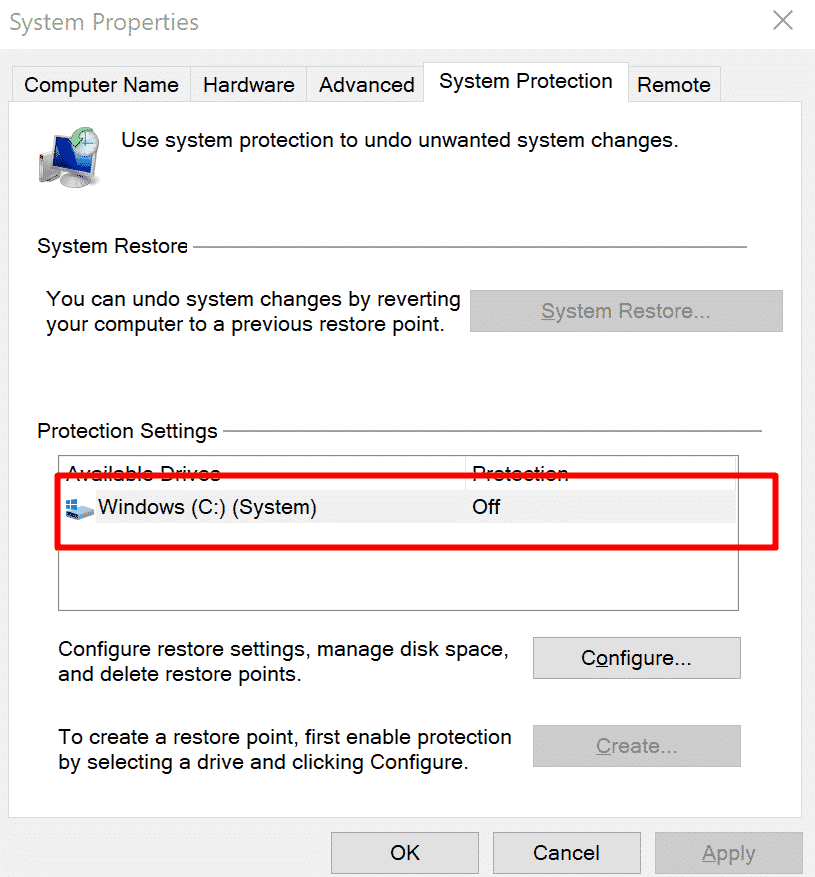
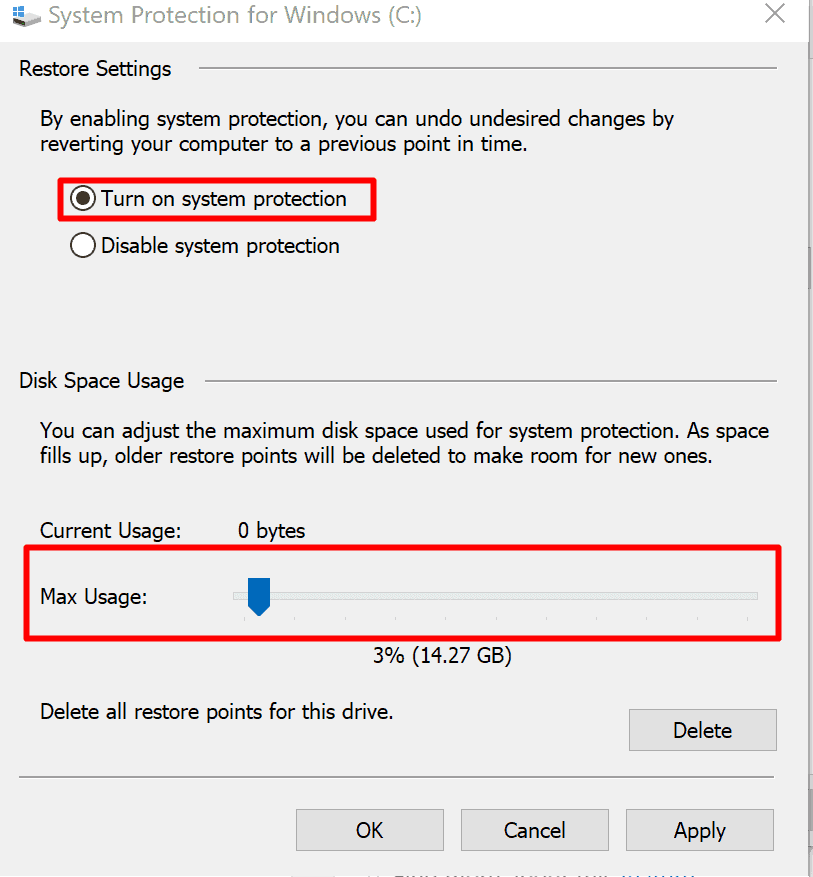
To set up the restore point feature, click on the “Configure” button. You need to select the “Turn on system protection” option. You can decide how much space you want the restore point to use on your machine. The space you allocate dictates how many restore points the system can keep before it deletes the old ones.
Once you have set your desired disk space for system restore, click the apply button to ensure the settings are saved. You can now click “Okay” to close the setup and keep the changes.
To create a restore point on windows, follow the steps above to launch the app. Start > Create restore point > System Properties experience. On the system protection tab, under protection settings, click the “Create” button. Enter your desired description. You can give your restore point a name that you will remember when you want to apply a restoration.
Click the “Create” button to make a backup of your system. When the process completes, you can close the dialog and click “Okay” on the main window.
On Windows 7, you can launch the System Restore app by opening the control panel and navigating to System and Security and opening the System link. You can also search for System on the start page. When the System window opens, click on the “System Protection” link on the left pane of the page.
After the window opens, the steps for creating the restore point are the same as Windows 10. Click on the appropriate buttons and provide your system restore point name and save the changes.
Manual Registry Backups
The steps for creating registry backups are the same for all versions of Windows. You can create a backup of a single key or the whole registry. We recommend that you back up the whole system because you are not sure what keys are affected. In case of a mess, a complete backup will help you restore the machine to its working state.
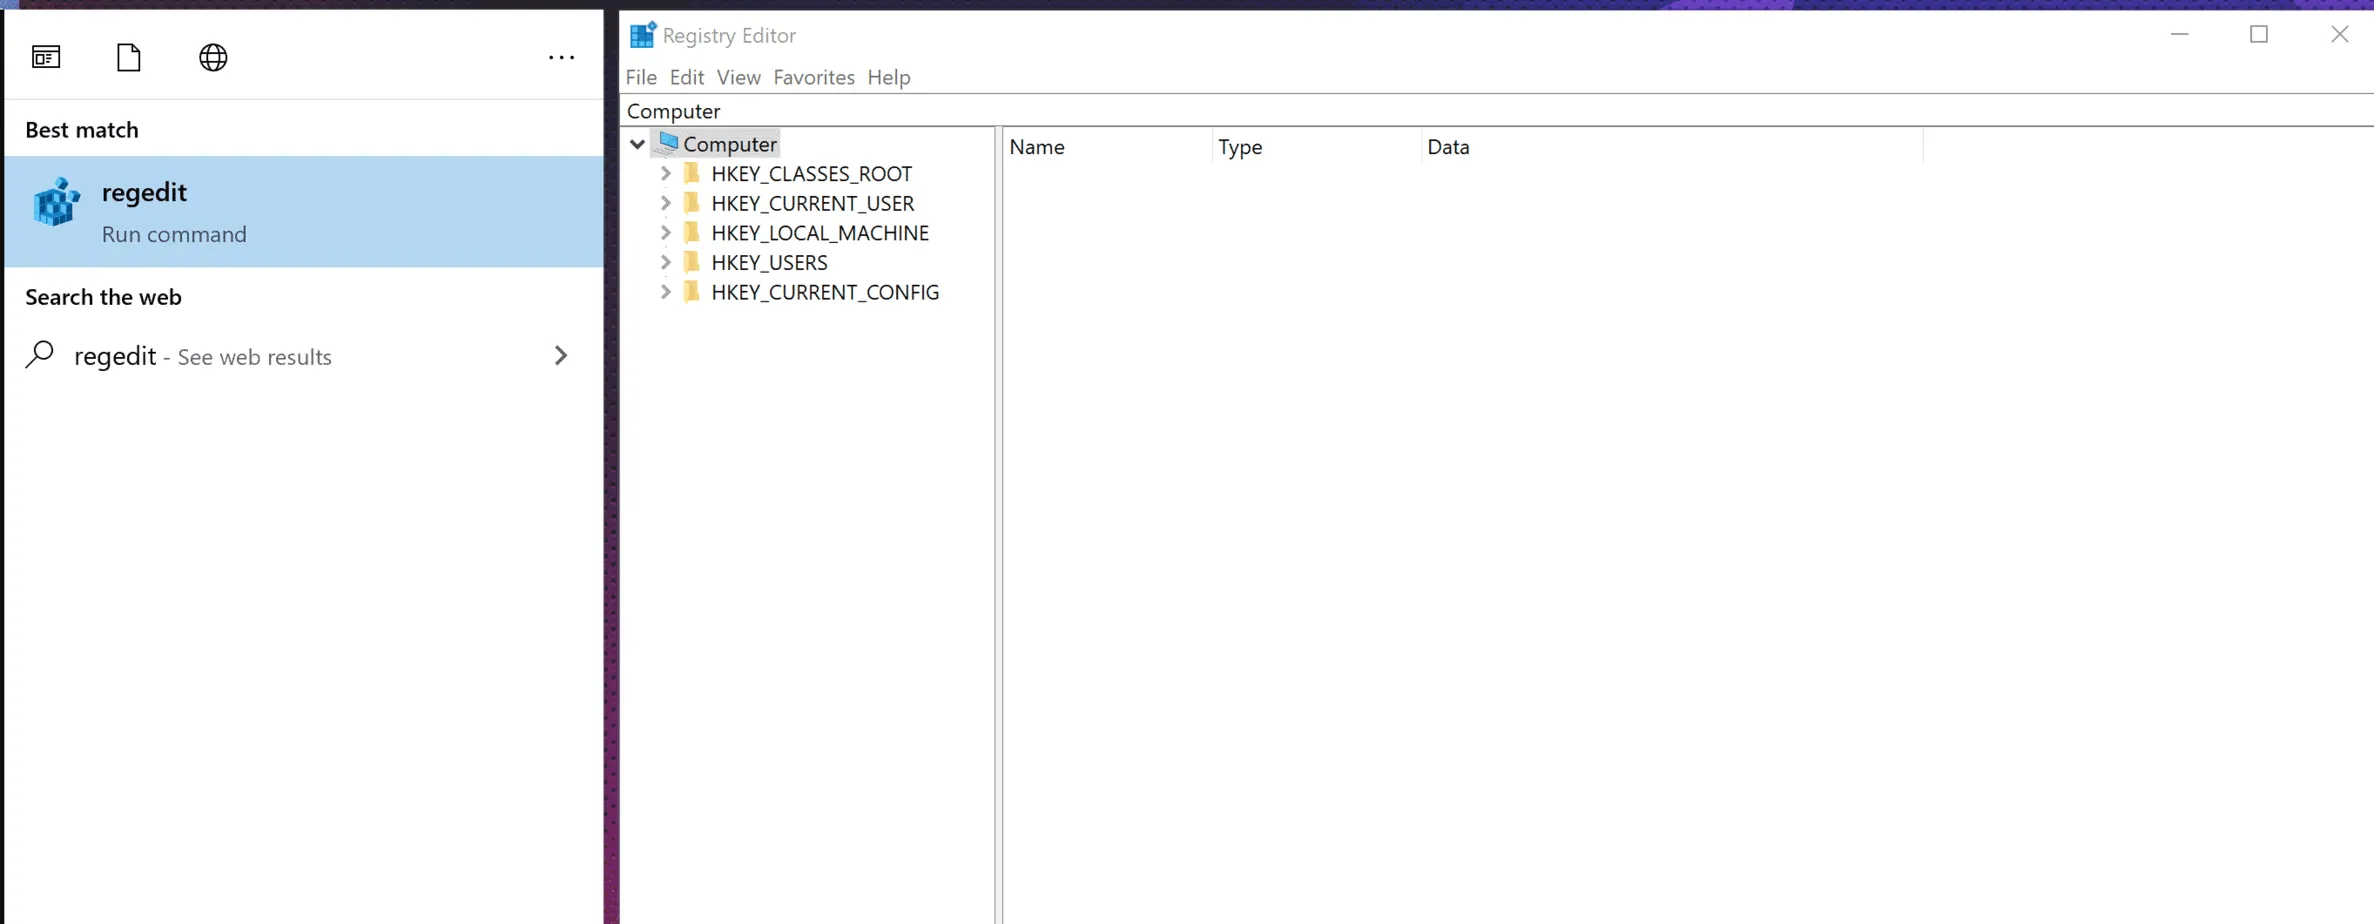
To create a registry backup, open the search and type “regedit”. Click to launch the Registry Editor app. In some versions of Windows, it will appear as regedit. You can also launch the application by pressing the Windows key and R simultaneously to launch the “Run” app and typing regedit. Hitting “enter” will open the application.
Once the registry editor has launched, click the “Computer” entry on the left pane. Ensure that the entry is highlighted. Now click on the “File” menu and click the “Export” submenu. Provide a name for the backup file. It will be used for identification when you want to restore a registry backup.
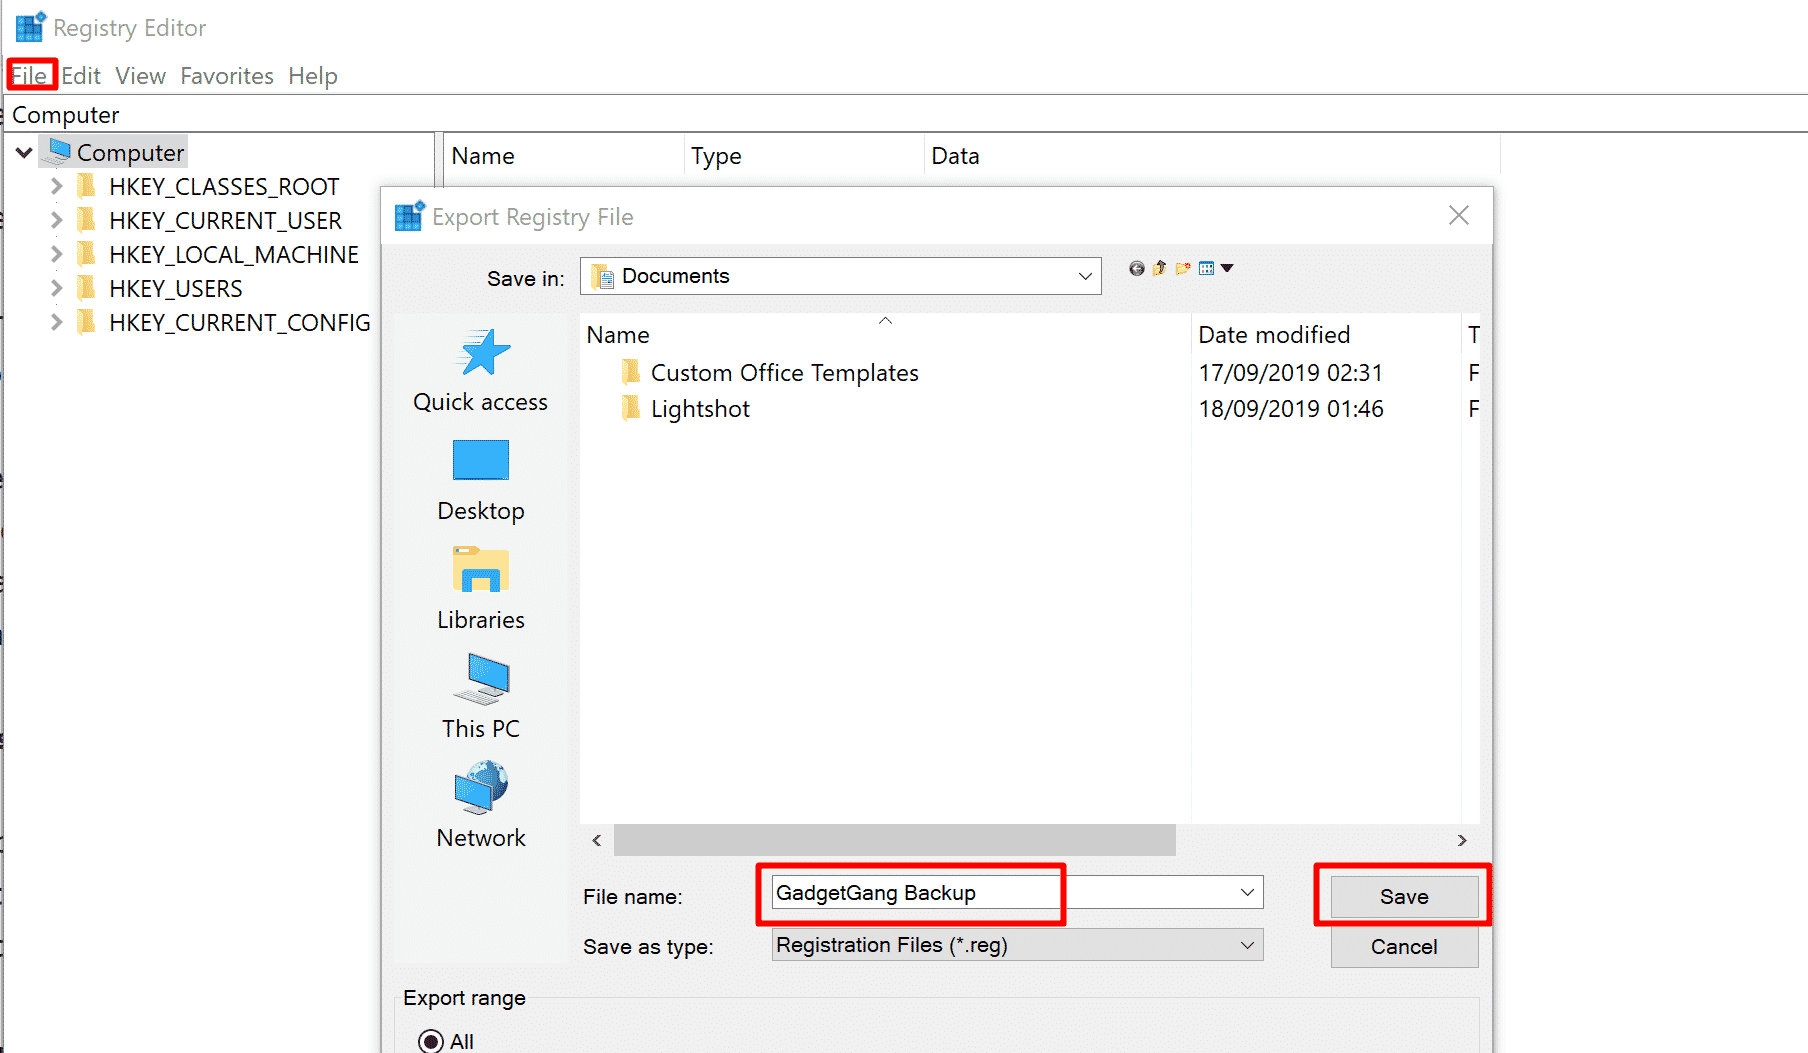
You will be prompted to select the backup range. Select “All” and provide a backup location. It is best practice to store your backups on an external drive or a partition outside your System drive. Click “Save” to create the backup.
Setting Up Automated Backups on Windows 10
On Windows 10, you can automatically back up your system without doing anything. Even so, the automated backups might not be as recent as you want when you want to make changes on your computer. In that case, manual backups are necessary. Even so, let us see how automated backups work on Windows 10.
By default, the automated registry backups on Windows 10 are disabled. The feature is, however, still active if you are using Windows 10 earlier than version 1083. You can, however, enable it whenever you want. Microsoft designed the feature to remain off “to reduce disk usage”. But the registry backups do not use up significant disk space. So, you can enable it. Here are the steps.
Open the start menu and search for regedit.exe or run regedit using the “Run” program. This will launch the registry editor. Create a backup of your current registry configuration because we are making direct changes to the registry.
After creating a backup, find the key “HKLM\System\CurrentControlSet\Control\Session Manager\Configuration Manager\”. Right-click the “Configuration Manager” key. Select “New”, and choose the Dword (32 bit) Value. Crate the value and name it EnablePeriodicBackup.
After creating the key value, you need to enable it. Double-click the value you just created and turn its value to “1”. Your automated registry backups are now set. Restart the PC to activate the changes.
Restoring a Registry Backup
After a successful backup, you will need the backup files or restore points to restore your system to its initial state in case any problem arises. However, you may not need to restore the backup when your updates and system changes go smoothly with positive results. You can safely discard the backups to create room for future backups.
If at any time you want to restore your backup, you can use the method you applied for creating the backup.
1. Restore by Restore Point
To restore your PC on Windows 10, open the System Properties Window (read above). Under the System Restore item, click on the “System Restore…” button. When the restore dialog opens, choose the restore point you want to use. Optionally, you can “scan the affected programs” to see if the changes will disable your latest applications.
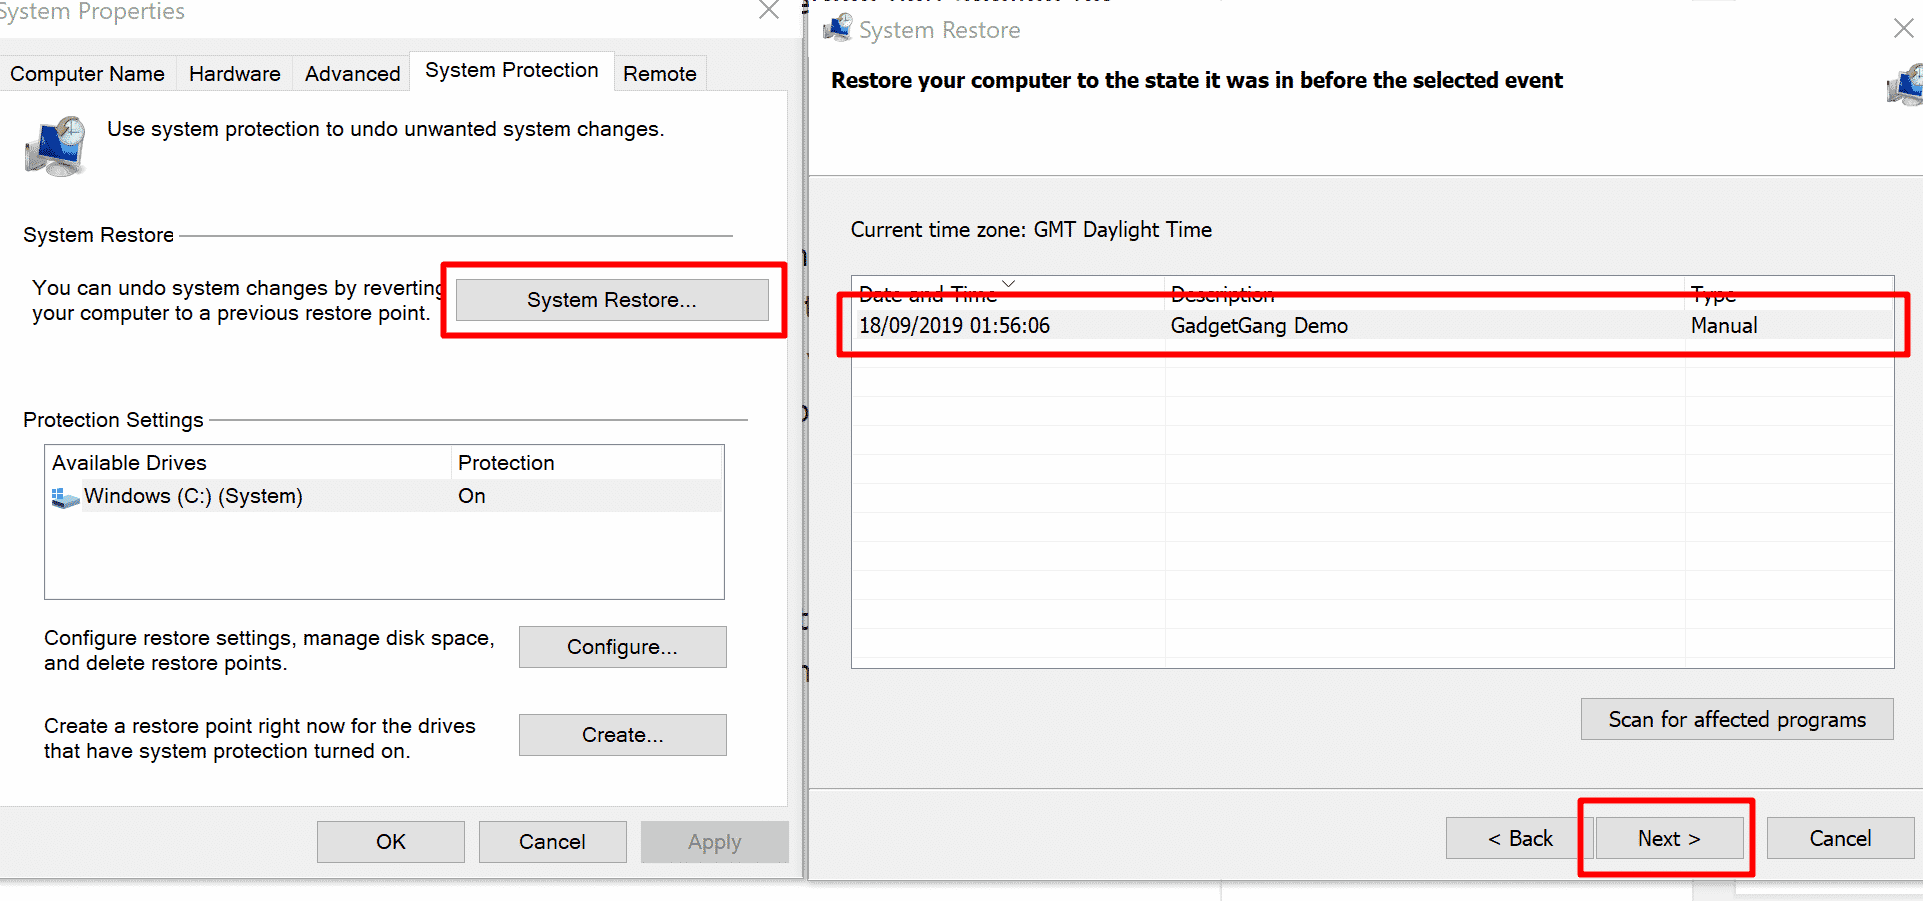
Click the “Next” button to restore your PC to an earlier state when the system was working. Restore point is much safer than editing the registry directly. You should go for this option if you are afraid of getting your hands dirty in the system changes.
2. Restore a Registry Backup
If you prefer to make a copy of the registry before editing anything on your PC, you can restore the changes easily by importing the backup. In this way, your PC will go back to its normal state before you made the edits. It is recommended to use this method when directly editing the registry.
To restore your backup, open the registry editor (see previous instructions). Click the “File” menu and click the “import” item. The “Import Registry File” dialog will prompt you to choose a file to import. Click the “browse” button, and navigate to the location you saved your registry backup (.reg) file.

Summing Everything Up
System changes are stored on your PC’s registry file in all versions of Windows. By creating a registry backup, you can recover it from any problem that may arise as a result of modifications to the system configuration file. Regardless of whether you are making manual or automated modifications, you need a backup of your system while it is working.
It is important to create backups as often as you can. Whenever you are carrying out a maintenance operation on your Windows PC, ensure you have backups to recover from in case of crashes. After carrying out an operation successfully, you can trash the old backups after verifying the integrity of your system’s current status. Then create a new backup you can use later.
red