
Discord is an extremely popular chatting app for all kinds of people. A lot of people make their friends or community servers. These contain all sorts of members, and sometimes it can get pretty hectic if boundaries are not set. This is why people create a channel specifically to state server rules. If you’re looking to create one of your own and you want to set up a rules channel, follow this guide and set up your very own rules channel in your discord server.
Setting Up a Rules Channel
With Discord having grown so much in popularity over the past few years, it is crucial to declare rules for your Discord server. Unless you only plan on inviting your close friends, rules will help your server stay in control. As long as you have your server or permission to create a channel in a server, you are good to go. To make a rules channel on Discord, follow these instructions:
Psst, you can also get a Welcome channel made on Discord too!
Making a Rules Channel on Desktop
To create a rules channel on Discord using a PC, follow these steps:
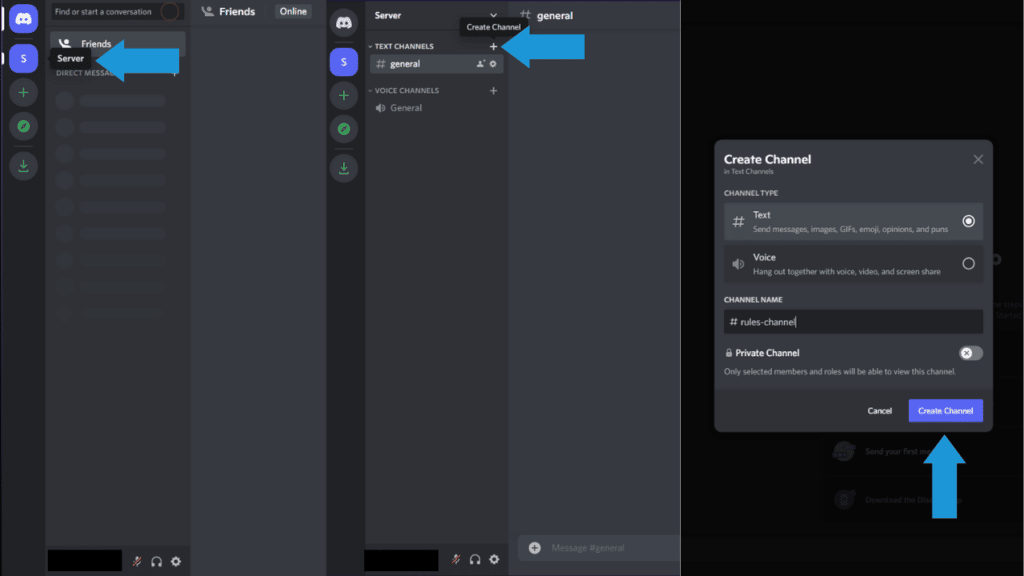
- Open Discord.
- Go to your server from the server list.
- Click the plus icon under ‘Text Channels‘ to create a new channel.
- Select Text, name your channel appropriately and make sure that the channel is not set to private.
- Once you’ve done that, click Create Channel and you have yourself a rules channel.
Making a Rules Channel on Mobile
To create a rules channel on Discord using your mobile device, follow these steps:
- Firstly, open Discord.
- Next, tap the Discord icon on the bottom left to open the server list.
- Go to your server and tap the plus icon under ‘Text Channels‘.
- Name your new rules channel appropriately, select Text and make sure your new channel is not private.
- Lastly, tap Create. You have now successfully created a rules channel.
Making The Rules Channel Read-Only
You’ve successfully created a rules channel on your Discord server; what now? Once you’re done creating a channel and have sent a message containing all of the rules for your server, the next step is to make the channel read-only for everyone else on the server. This ensures that no additional messages are sent on the rules channel, and it stays only for the rules. You can do this by following these steps:
Making a Channel Read-Only on Desktop
- Firstly, open Discord.
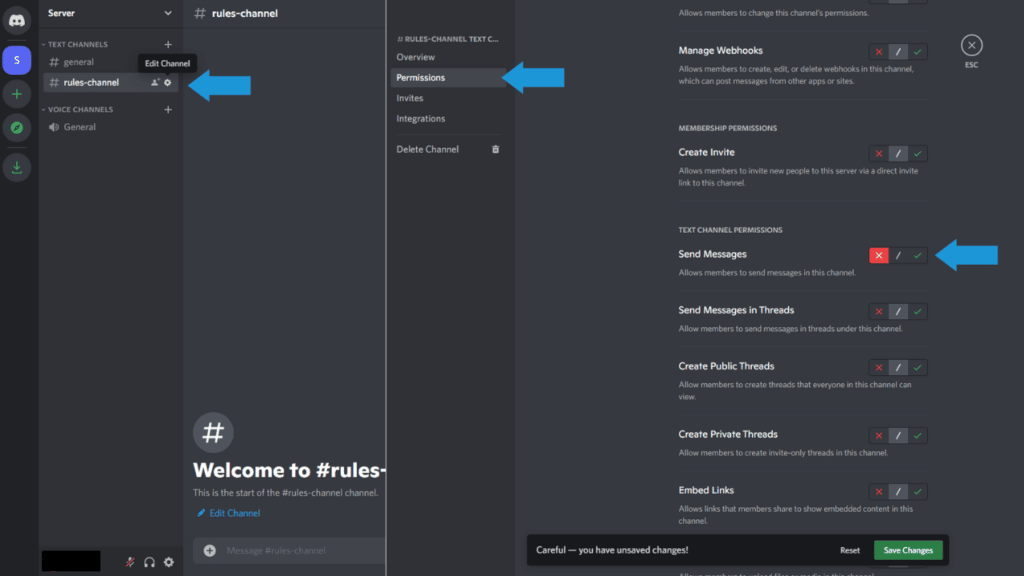
- Secondly, go to your server and open the existing rules channel.
- Click on the gear icon next to the channel’s name to go to channel settings.
- Now go to Permissions and click on @everyone (or the default role).
- Scroll down to find Send Messages.
- Finally, click the cross button and save the changes.
Making a Channel Read-Only on Mobile
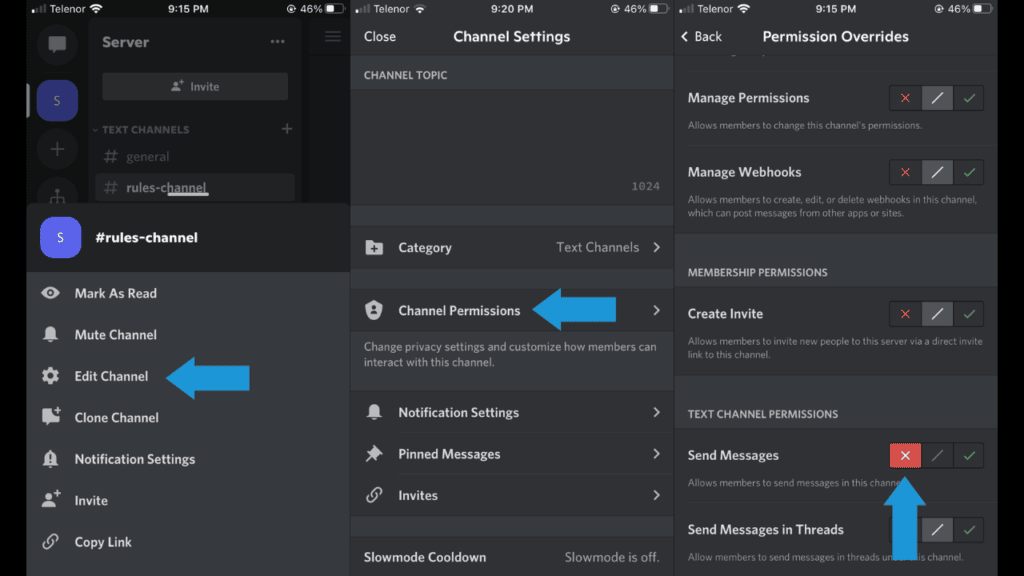
- Firstly, open Discord.
- Next, tap the Discord icon on the bottom left to open the server list.
- Go to your server and open the rules channel.
- Tap and hold the name of the channel and select Edit Channel.
- Go to Channel Permissions and open Advanced View.
- Now, add the default role (a role that every member has) or simply tap @everyone.
- Finally, scroll down to Send Messages, and select the cross button.
Conclusion
Now you’ve got yourself a rules channel in your very own server. You can further choose for this channel to be the channel that new members are first sent to when they join. Do you have your server yet? Did you find this guide helpful? Let us know in the comments below!