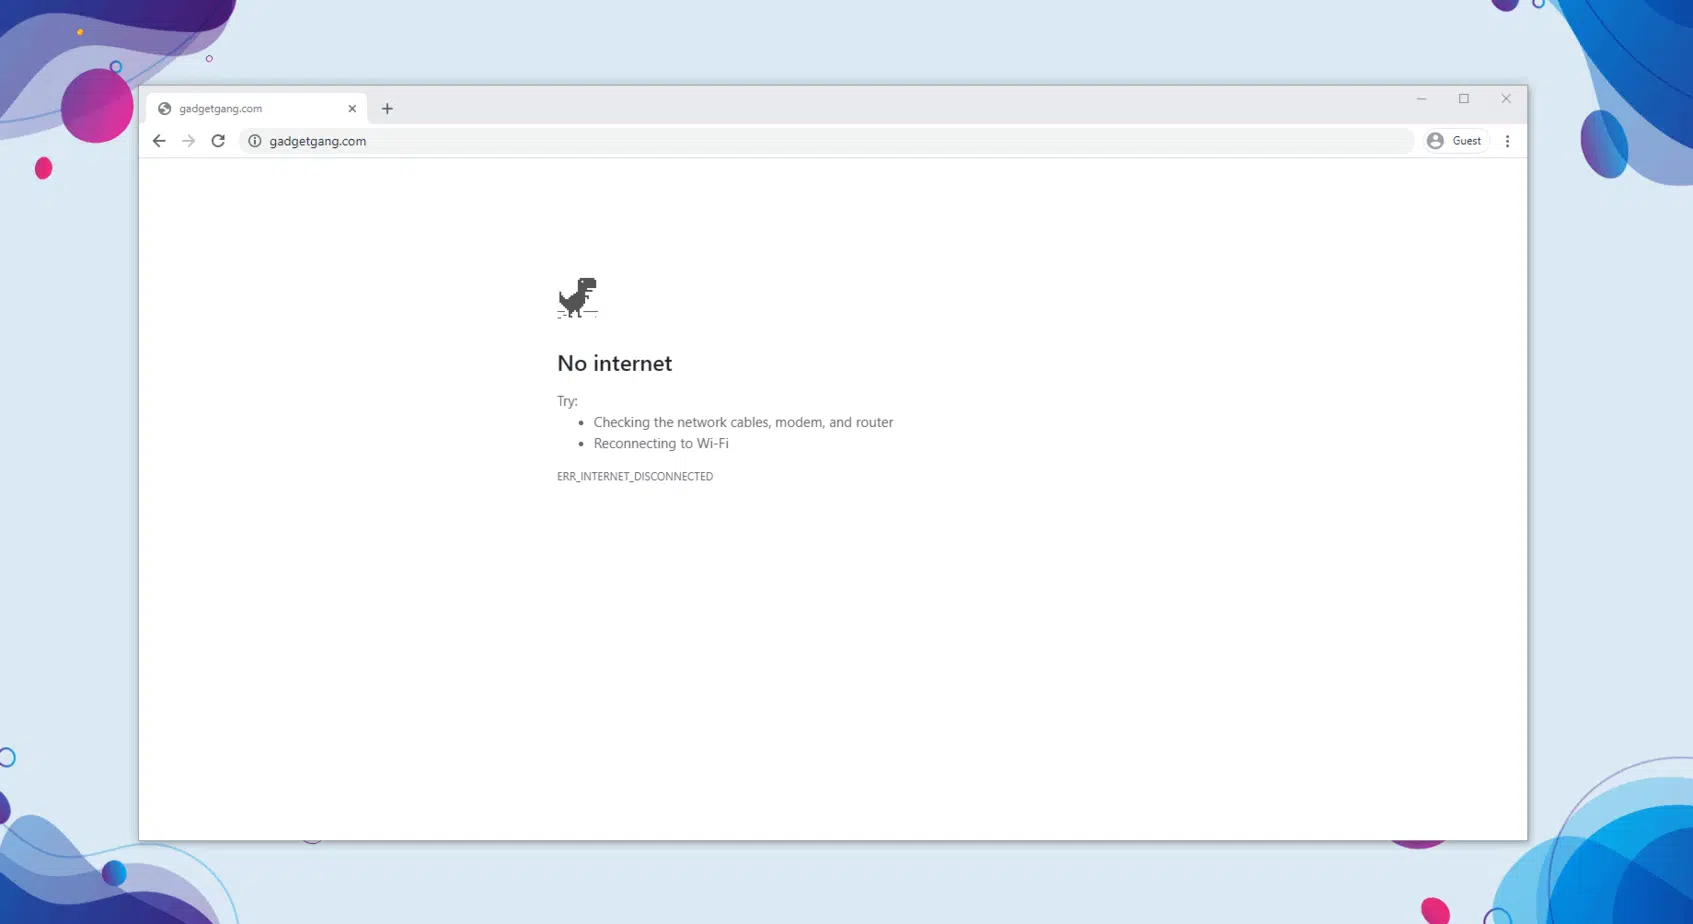
Is your wifi connected but no internet on your Windows desktop or laptop?
In today’s modern age, the internet is everything. From doing a simple word search all the way up to streaming your favorite movies.
Thanks to wireless connectivity, we are able to access the internet without any cables using WiFi. However, there are times where you encounter issues with your network connection and it is really frustrating if you can’t get it to work right away.
Recently, there have been reports from several users who are reporting that they are able to connect to their wireless connections but with no internet access. When it comes to network connection issues on Windows 10, there are a few angles that you should look into.
In this case, we decided to create an in-depth guide that will show you how to fix the issue with your wifi connected but no internet access on Windows 10.
Let’s get started, shall we?
- 1. Try Your Other Devices.
- 2. Check Your Internet Connection.
- 3. Restart Your Computer.
- 4. Run the Network Troubleshooter.
- 5. Check Your IP Address Settings.
- 6. Execute Winsock Command.
- 7. Renew Your IP Address.
- 8. Flush Your DNS.
- 9. Use Google’s DNS Server.
- 10. Update Your Network Drivers.
- 11. Check for Windows Update.
- 12. Reset Your Network Settings.
1. Try Your Other Devices.
If you are seeing the no internet access error on Windows 10, the first thing that you should try doing is to check your other devices to see if they can connect. This way you can easily identify if the problem is with your ISP (Internet Service Provider) or isolated with your Windows 10 device.
Check your smartphone or tablet and try to access a few websites using your browser. If your wifi connection works normally on your other devices, then it is safe to assume that the issue is with your computer. Head over to method 3 to guide you on what to do with your computer.
However, if you are unable to access the internet on all of your devices, then the problem could be with your router or ISP. In this case, proceed to the next method below to troubleshoot your network connection.
2. Check Your Internet Connection.
Internet service providers would often provide routers for you to use. If you are having problems with your network connection, check your router if all the light indicators are working normally. Usually, routers would have a flashing red light if something is wrong with it.
If this is the case, go ahead and restart your internet router. Locate the power cable of your router which is usually located at the back and remove it. Now, wait for 5 to 10 seconds and plug back in the power cable to your router to turn it on.
Wait for the router to completely startup and connect to your wireless connection once again.
Now, try to browse a few websites to verify if the wifi is connected
On the other hand, if you are still unable to access the internet on all of your devices, it is best that you contact your ISP and report to them the issue that you are experiencing with their internet service.
3. Restart Your Computer.
Network connection issues on Windows 10 is often caused by a temporary bug on the operating system that causes some functions like wireless connectivity to not work. To resolve this, try restarting your computer to allow your operating system to reload all of its resources and drivers.
Follow the steps below to guide you on how to restart Windows 10 properly.
- First, press the Windows key on your keyboard to launch the Start menu.
- Now, click on the Power button to open the option menu.
- Lastly, click on Restart to begin rebooting your operating system.
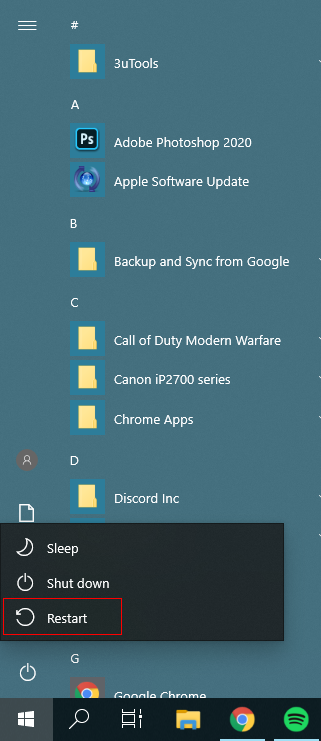
Wait for Windows 10 to startup then connect to your network once again to check if the wifi connected but no internet access on Windows 10 issue is already fixed.
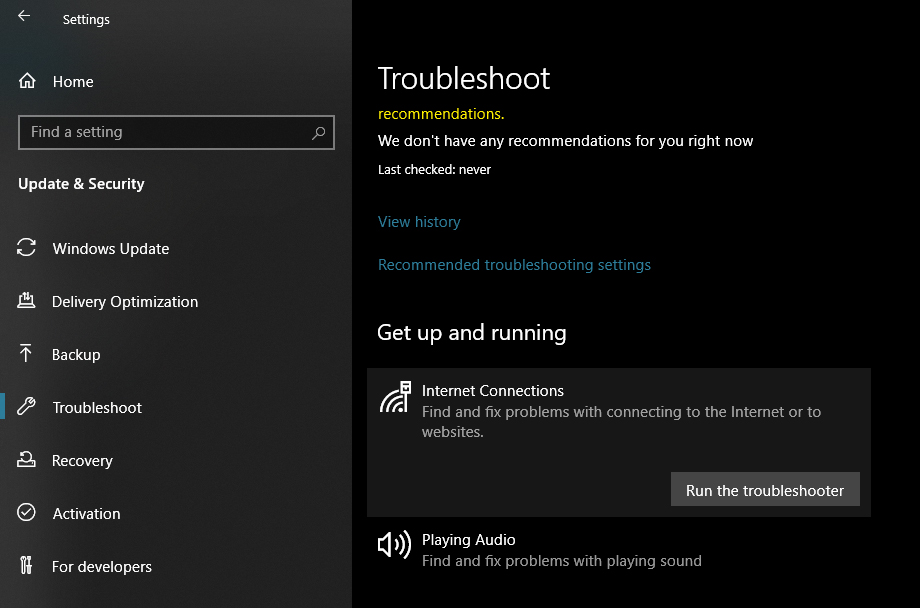
4. Run the Network Troubleshooter.
Windows 10 is equipped with built-in tools that you can use to troubleshoot system problems on your computer. The network troubleshooter is a useful tool that you can run on your system to diagnose the no internet access problem on Windows 10.
Check out the steps below on how to run the network troubleshooter on your computer.
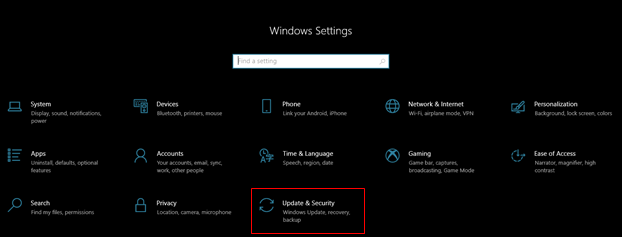
- On your keyboard, press on the Windows + I key to open Windows Settings.
- Inside Windows Settings, click on Update & Security.

- After that, click on the Troubleshoot tab from the side menu.
- Now, click on Internet Connections under the ‘Get up and Running’ tab.
- Lastly, click on Run the troubleshooter and follow the on-screen prompts to use the network troubleshooter on your computer.
If the troubleshooter suggested a possible fix for your problem, click on the ‘Apply this Fix’ button to proceed.
Once done, restart your computer and try to browse the internet once again to see if the issue with your internet access is already resolved.
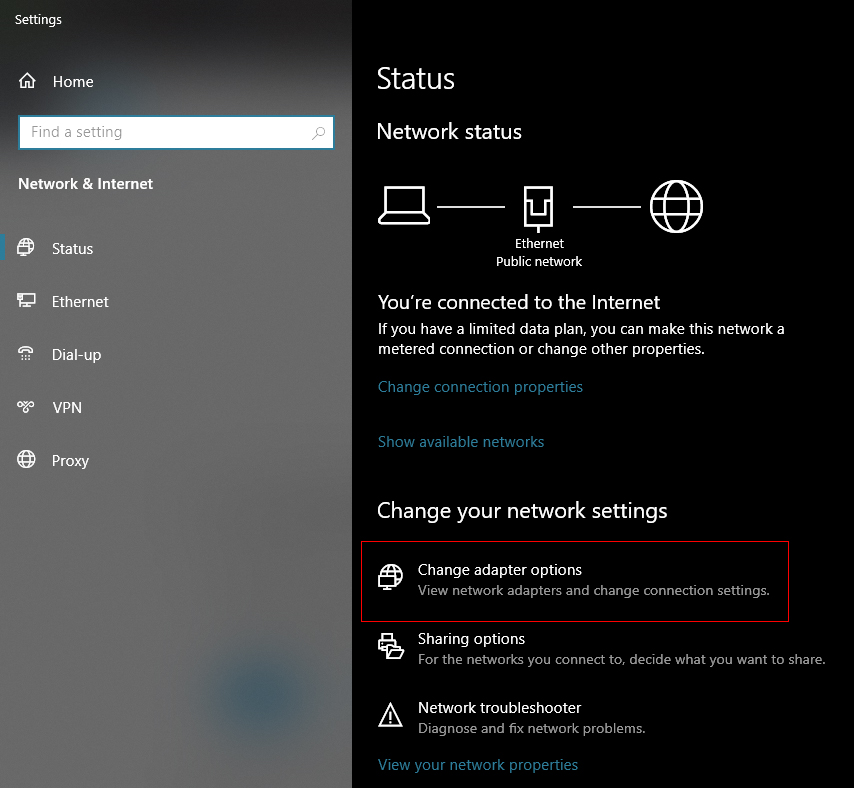
5. Check Your IP Address Settings.
IP Address is a unique identifier for every device that is connected to the internet. If your computer’s IP is not properly configured, then network systems won’t be able to recognize your device which explains the ‘wifi connected but no internet access’ problem on Windows 10.
To fix this, make sure that your IP Address is obtained automatically.
- First, press on Windows + I key on your keyboard to open Windows Settings.
- After that, tap on Network & Internet.
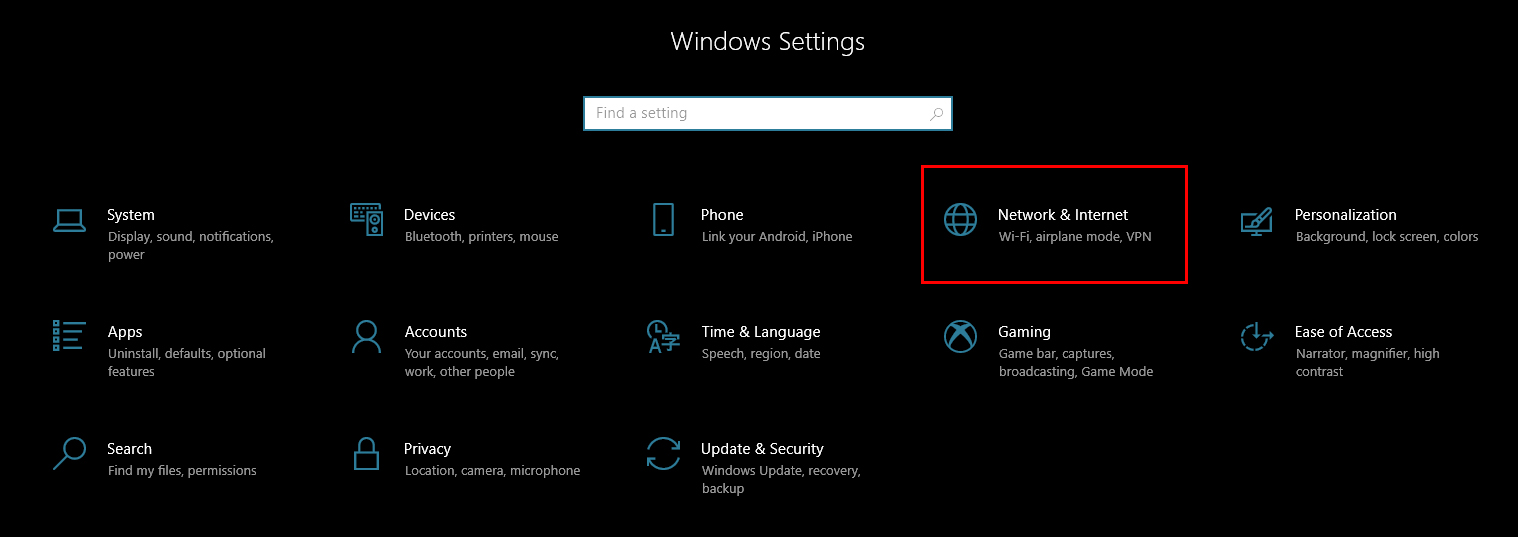
- Inside Network & Internet, tap on Change Adapter Options.
- Now, right-click on your wireless network and select Properties.
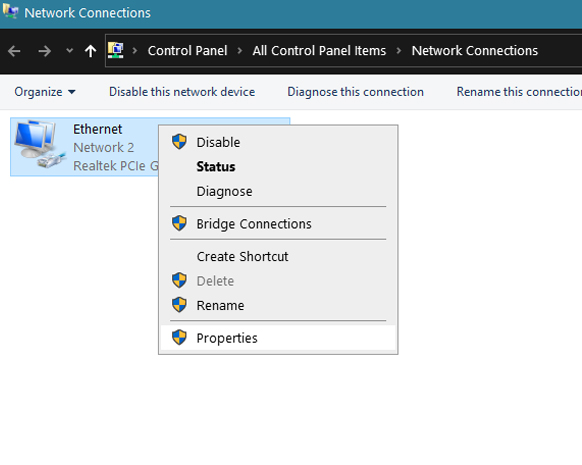
- Inside Properties, locate Internet Protocol Version 4 (TCP/IPv4) and double-click it.
- Lastly, ensure that ‘Obtain an IP Address Automatically’ is selected. Click on Ok to save the changes.

Give your system a restart after applying the changes and try to access the internet using your wifi once again to see if the problem is already resolved.
6. Execute Winsock Command.
Winsock reset is a command used on Windows 10 that helps the operating system to recover from any socket errors that may have occurred while you are using your network connection.
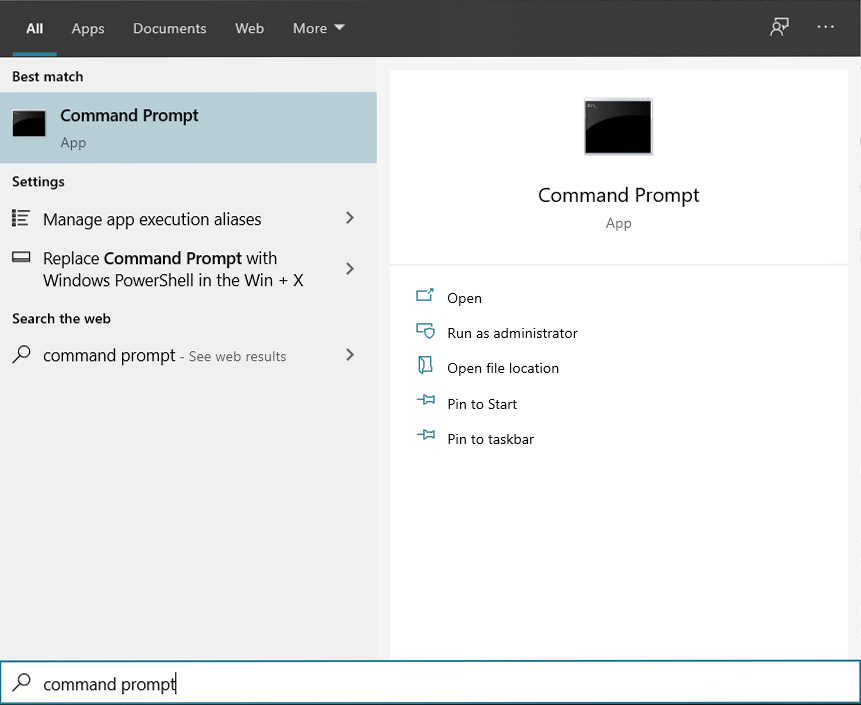
To execute winsock command on your computer, you would need to launch Command Prompt first.
- On your computer, press on Windows key + S on your keyboard and search for Command Prompt.
- After that, click on Run As Administrator to open it.
- Inside Command Prompt, type the following commands one by one and hit Enter:
netsh winsock reset
netsh int ip reset
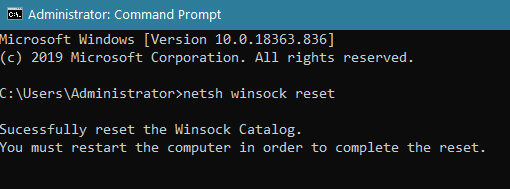
- Lastly, close Command Prompt after executing the commands and restart your computer.
After Windows has rebooted, try to use your wifi connection to access the internet once again to see if the problem will still occur on Windows 10.
On the other hand, if you are still seeing the ‘wifi connected but no internet access’ error on Windows, proceed to the next method below to try and fix the problem.
7. Renew Your IP Address.
As mentioned above, your computer’s IP address is important when you want to use the internet. In this case, you can try renewing your IP address so that your ISP can assign a working IP address for your computer.
To do this, check out the step-by-step guide below.
- First, press on the Windows key + S on your keyboard and search for Command Prompt.
- After that, click on Run As Administrator to launch CMD with administrative privileges.
- Inside Command Prompt, type the following commands one-by-one and press Enter after each line:
ipconfig /release
ipconfig /renew
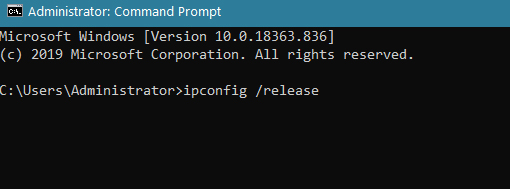
- Finally, restart your computer.
Wait for your computer to completely boot and try to access the internet using your wifi connection to check if it is already working properly.
8. Flush Your DNS.
If renewing your IP address did not work in fixing the issue with your network connection, what you can try doing next is to flush your DNS. Domain Name System or DNS is also an important element on your network that is used to relay IP addresses of websites into domain names like google.com
To flush your DNS, check out the guide below.
- First, open Command Prompt once again on your computer.
- Inside Command Prompt, enter ipconfig /flushdns followed by the Enter key on your keyboard.
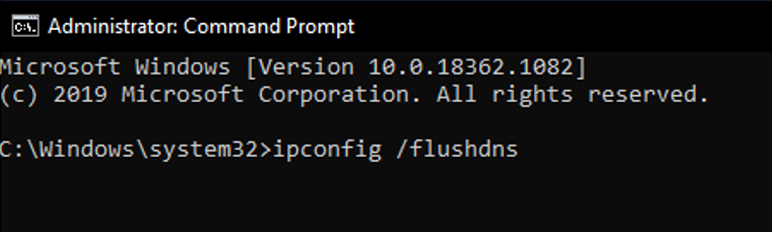
- Lastly, close Command Prompt and restart your computer.
After restarting your computer, go back to your browser and try to access a few websites using your wifi connection to see if the no internet access problem is already resolved.
9. Use Google’s DNS Server.
Possibly, your ISP’s DNS server might be experiencing issues as of the moment so even flushing it won’t work on your computer. If this is the case, you can use Google’s own DNS server so that you can restore the internet access on your computer.
To use Google’s DNS server, follow the guide below.
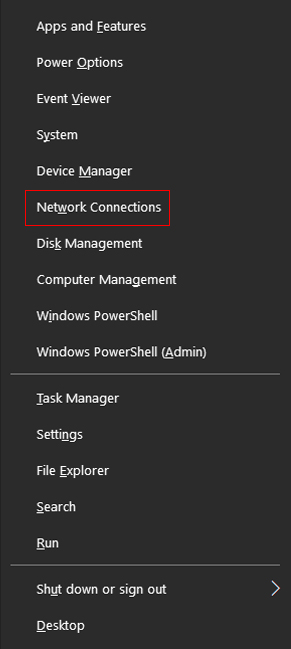
- On your keyboard, press and hold the Windows key + X to open the Quick Access Menu.
- After that, click on Network Connections.
- Inside Network Connection Status, click on Change Adapter Options.

- Now, right-click on your current Network Adapter and select Properties.

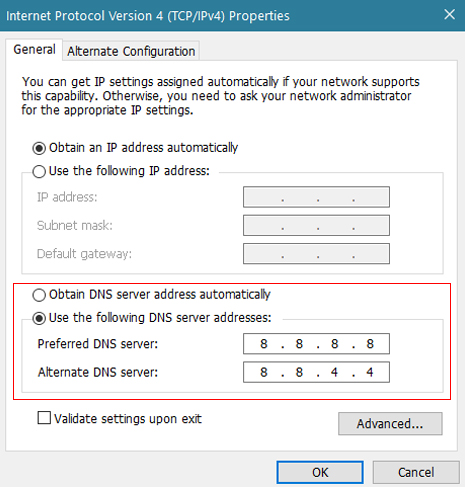
- A pop-up window will appear, double-click on Internet Protocol Version 4 (TCP/IPv4).
- Lastly, click on ‘Use the Following DNS Server Addresses’ and enter the following values:
- Primary DNS Server: 8.8.8.8
- Alternate DNS Server: 8.8.4.4
Save the changes afterwards and try to access a few websites using your wifi connection to check if it is working properly.
10. Update Your Network Drivers.
If your wireless connection is not working properly, there is a good chance that the issue is related to your network drivers. If you have an outdated driver on your system, this can cause software compatibility issues which explains the ‘wifi connected but no internet access’ error on Windows 10.
To make sure that your network drivers are up to date, follow the steps below.
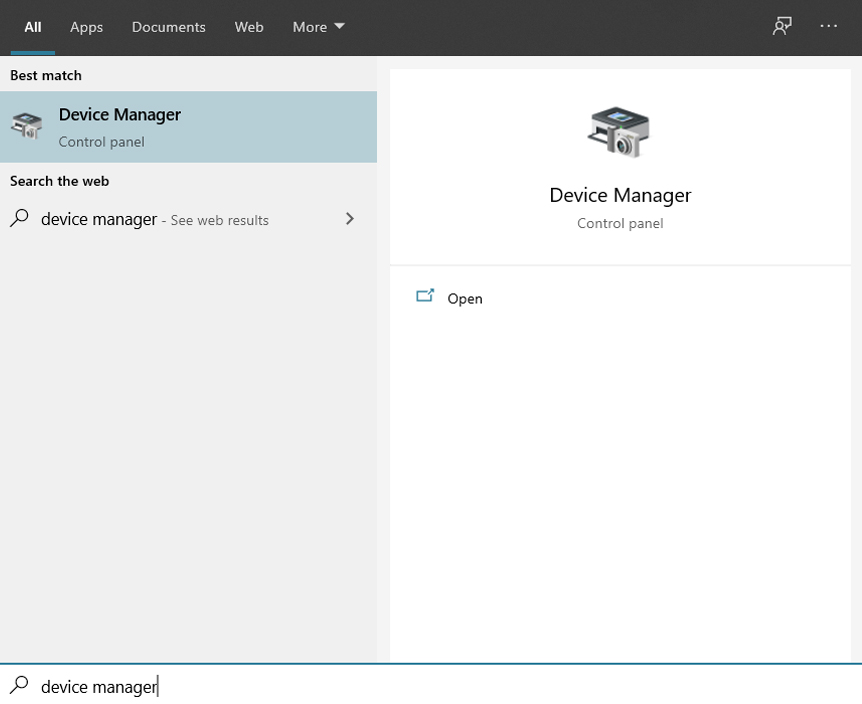
- On your keyboard, press on the Windows key + S and search for Device Manager.
- Next, click on Open to launch it.
- Inside Device Manager, click on Network Adapters to expand it.
- Now, right-click on your wireless network adapter and click on Update Driver.

- Lastly, click on ‘Search Automatically for Updated Driver Software’ and follow the on-screen prompts to proceed with the update.

After the update, restart your computer and connect to your wireless network once again to verify if the problem is already resolved.
However, if you are still having issues with your wifi connection, proceed to the next method below to try and fix it.
11. Check for Windows Update.
The wireless connection issue on your system might be caused by a glitch on your operating system that makes other features like a wireless connection malfunction.
In this case, you can try checking if there’s an available update for your operating system to patch the software glitch.
- First, press on Windows key + I on your keyboard to open Windows Settings.
- Inside Windows Settings, tap on Update & Security.
- Lastly, click on the Windows Update tab from the side menu. This will prompt your system to check for any possible update on your operating system. If available, follow the on-screen prompts to download and install the update to your computer.

After updating Windows, restart your computer and try to use your wifi once again to access the internet to see if your wireless network is already working.
12. Reset Your Network Settings.
For the last method, what you can try doing is to reset your network settings. There is a possibility that you mistakenly changed some of your system settings that resulted in a ‘wifi connected but no internet access’ error.
Instead of finding the misconfigured settings, simply reset your network settings to ensure that it is set to factory default.
- First, press on the Windows key + I on your keyboard to open Windows Settings.
- After that, tap on Network & Internet.

- Lastly, click on Network Reset and click the Reset Now button.

Follow the on-screen prompts to continue with the procedure. Once done, access the internet once again using your wifi connection to see if the no internet access problem is already fixed.
This wraps up our guide on how to fix wifi connected but no internet access on Windows 10. If you are still having problems with your wireless connection, we suggest that you visit the nearest service center in your area and have them check your network card for possible hardware problems.