
You can take a screenshot of your steam game by pressing the f12 key, however, some people are having trouble trying to find the Steam screenshot folder, don’t worry you are not the only one. In this extensive guide, I am going to show you a few ways on how you can access the Steam screenshot folder so you can view, share or even upload your newly taken screenshots.
We find many people asking “where are steam screenshots saved” or “where does steam save screenshots” but there is no official answer on the Steam website, this leaves people confused so without further ado, let’s jump straight into the guide.
Access The Steam Screenshots Folder Through Steam
In our opinion, this method is the best way where to find steam screenshots. you go straight through the steam client which will then redirect you to the folder in a few clicks.
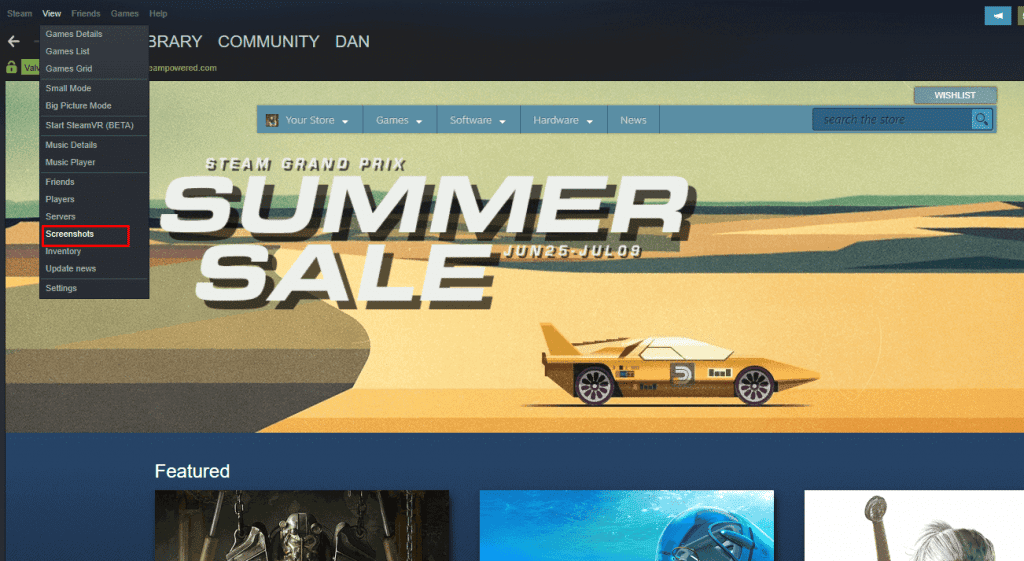
1: Load up the steam client from your Windows or Mac Computer, on the top left on the client you click on the view tab then select screenshots from the dropdown menu.
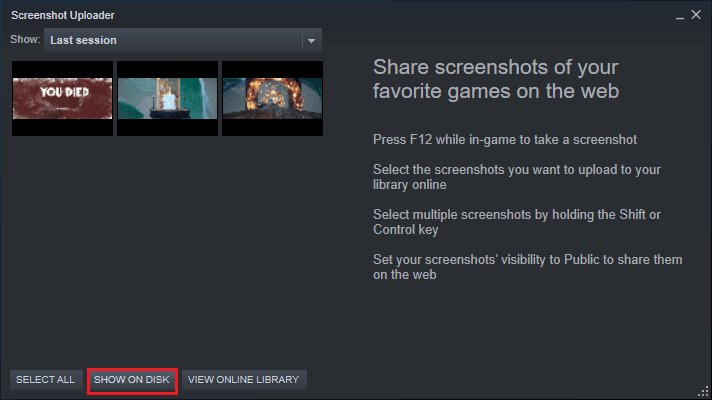
2: Once selected the screenshot uploader box will pop up, you then have a few options to choose from such as only showing screenshots from certain games or, just showing the screenshots you have taken from your last gaming session. Once you are happy with your selection click on the “SHOW ON DISK” button.
3: And that’s it, you now know how to find steam screenshots by using the client. From this folder, you can upload, share or delete your screenshots.
Access The Steam Screenshot Folder Directly
What happens if you can’t access the Steam client? Let’s say you’re internet went down for the day and you desperately wanted to show your friend a screenshot what do you do? Well, you can access the Steam screenshot folder directly from your computer by browsing to the folder.
1: Open up your file explorer and navigate to the following location:
C:\Program Files (x86)\Steam\userdata\[USER-ID]\760\remote\[GAME-ID]\screenshots
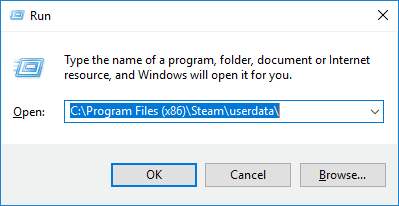
You must fill in the [USER-ID] with your own, the best way to find this is to hit Ctrl + R on your keyboard and paste C:\Program Files (x86)\Steam\userdata\ into the box then hit ok.
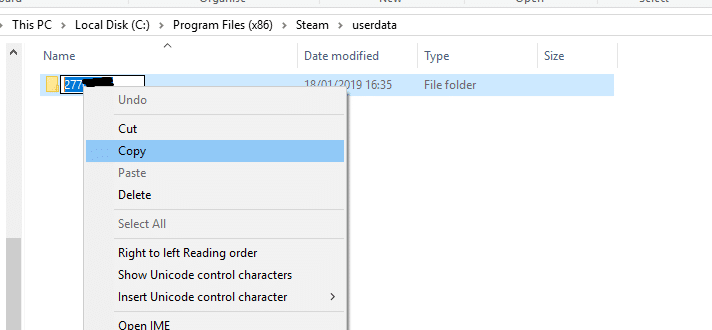
2: You will then see a folder which has some random numbers as the name, the name of this folder is your [USER-ID] copy this number and save it into a notepad file somewhere.
Alternatively, you can find your steamID by using this website.
Now we need to find the [GAME-ID] This is the ID of the game you have taken the screenshots on. For example the game ID for Counter-Strike: Global Offensive is: 730.
3: To find the ID of a game you can visit the following website: https://steamdb.info/apps/ however, now we have your [USER-ID] finding the screenshots you want should be pretty easy without knowing the game ID. Once again hit Ctrl + R on your keyboard and paste in the following:
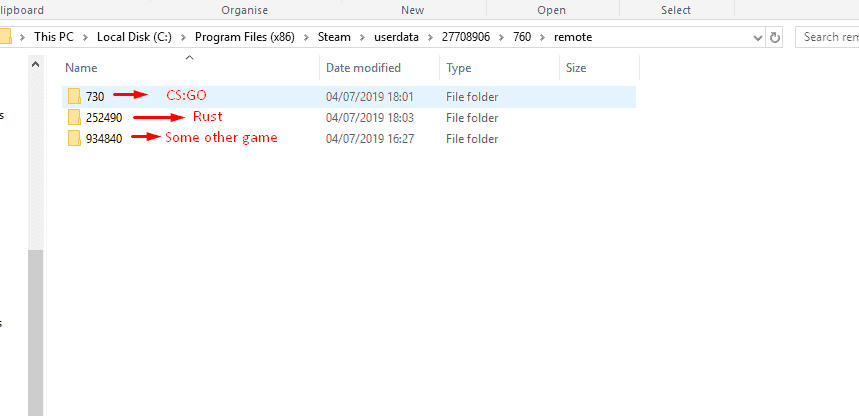
C:\Program Files (x86)\Steam\userdata\[USER-ID]\760\remote\
Replace the [USER-ID] with the ID we copied earlier and hit ok.
4: You should now see a few folders with different names, these folder names are game ID’s meaning each folder you see here will contain your screenshots.
If I wanted to view my CS:GO steam screenshot folder I would click the folder “730” as this is the game ID for that game.
Change your steam screenshot folder
Some people might want to change the location of the screenshot folder, people usually change the location of the folder to there desktop or somewhere they can quickly access it.
1: Once again open the steam client then click on the view tab on the top right of the program. You can then click on the settings feature from the dropdown list.
2: You should now see a settings window, click the in-game tab then press the “SCREENSHOT-FOLDER” button.
Note: from this window, you can also change your shortcut key to anything you like.

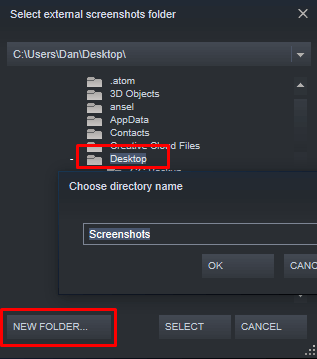
3: Choose a new location for your screenshots to be saved, in this example, we want to save them to the desktop so double click the desktop folder and hit the “New Folder” button. Type in a name you want then press ok.
How to Upload And Share Your Screenshots
There are only a few reasons why you are capturing these pictures and I’m sure one of the reasons is to share them either publicly or privately with your friends. When it comes to uploading your shots there are a few ways you can do it.
Using Steams system: You can use the built-in screenshot uploader that comes with steam, to open it simply load your steam client and from the top left click view then screenshots. You can then upload your pictures directly to your profile. Steam gives you the option to either make the photo private or if you want it public so everyone cans see it, however, if you only want your friends to see the picture you can also choose this option.
Using an image hosting website: Using Steams built-in system does have some drawbacks, for example. If you wanted a to create a link to your image so you can share it over text or social media you cant. That’s why using an image hosting website such as imgur can come in handy. In order to upload a picture to imgur you must find the steam screenshots folder by following the guide above, once you have found the folder and picture you want to upload, simply drag and drop the image onto imgur’s homepage, wait for it to upload and then you will be given a link that you can share with anyone.
Conclusion
We hope that this guide has helped you find your steam screenshots folder, we have decided to make this an extensive guide as we have seen the question “where does steam save screenshots” asked many times. We know that finding this folder manually can be a pain but we have included the best way to do so.
If you are still struggling to find where are steam screenshots saved then you can always leave a comment, we will be sure to get back to you as soon as we can!