AirPods and other wireless earphones don’t come cheap. And, if one of your AirPods is louder or quieter than the other, you might want to find a way to fix it. Many AirPod users experienced this issue in older versions of the AirPods, including the AirPods 1st and 2nd gen– and even on the AirPods Pro. So if you want to learn some of the most effective fixes, you came to the right place.
We did a ton of research and trial and error to find out the cause and how to fix them. We came up with a few possibilities on why this issue is present in both older versions of the AirPods and even in the latest AirPods Pro 2.
We also came up with the 7 most effective ways to fix the issue, so if you are experiencing and caused why one Airpod is quieter than the other – you might want to stick around.
Why Is One AirPod Louder Than the Other?
The most common reason why one AirPod is louder than the other is because of excessive ear wax blocking the sound holes. When your AirPods are not properly taken care of, they can collect a bunch of dust particles or get filled with earwax that covers the main speakers. If you want your AirPods to last and avoid having one piece become quieter than the other– clean your AirPods from time to time. AirPods might be a little on the expensive side as far as wireless earbuds go – but physically maintaining them can still affect their lifespan, especially in terms of audio quality.
However, if you experience this issue pretty early on or when you first used them out of the box, it could be something else. We found that some people experience this issue due to a hardware malfunction, some software problems, and glitches between the connections. If that is the case– the only solution might be to return them and get a new pair from the Apple Store if they are still under warranty.
But don’t worry, cause the latter issue might not be the problem for you if you have been using your AirPods for a while now and just experienced the issue recently. With that being said, here are some of the most common fixes we found to be the most effective.
One AirPod is Quieter Than the Other: 7 Fixes
Now that you have an idea why one of your AirPods is louder or quieter than the other here are some quick fixes we came up with that just might work for you:
1. Connect your AirPods to a different device
Before trying to fix your AirPods with the latter solutions, you might want to try using a different pair of AirPods or try using your AirPods across different devices to rule out some possibilities.
If your AirPods are not working properly on every device, then the problem is with the AirPods. If they do work properly on your iPhone, but not on your iPad– then it might be a software issue. Note that even the iPads and Mac computers with the powerful M1 chip run into malfunctions sometimes, so do not rule out the possibility of a software problem.
2. Clean your AirPods and charging case
As we mentioned before, excessive dust and dirt can damage your AirPods’ hardware, and something as simple as cleaning your AirPods, including the charging case, might fix the issue you are dealing with. When cleaning your AirPods, you should include cleaning the charging case as well to avoid problems with charging when it gets clogged with debris.
If you are about to clean your AirPods and charging case make sure you use a lint-free cloth and gently wipe the AirPods and the charger’s contact points. Using tissue and other types of fabric can leave a residue that will cause more harm than good.
We suggest using the Apple Polishing Cloth because it is designed for cleaning Apple devices. However, if that is too pricey for you– any lint-free cloth will do fine. Another pro tip is to use a fresh toothbrush to remove the more compact particles stuck on your AirPods’ speakers.
3. Siphon the debris out of your AirPods’ speaker
If the main problem is due to the accumulation of excessive earwax, one quick fix can be sucking it out of the AirPods. Although it might not be the most sanitary option, this fix has proven to be one of the most effective options for users.
To avoid getting bacteria in your mouth, make sure you use a clean lint-free cloth and put it between your lips and the AirPod before you try to, for lack of a better word, “suck” the wax off. Give your AirPods a quick wipe after every blow to remove the excess wax and debris. This problem is highly similar to the iPhone’s charging port issue, which requires the same fixes.
After trying out this solution, you can check to see if the sound quality improved. Another indication that your AirPods are free from stuck particles is when you can feel the air pass through the speakers when you blow on them.
4. Check if your audio is balanced
If cleaning your AirPods didn’t quite fix the problem, maybe it has something to do with your software and connections. Go into your iPhone or iPad’s Settings, tap Accessibility, then go to Audio/Visual.
At the bottom of the screen, you will find a slider that indicates the audio balance, and if it’s not already in the center, drag the slider with your finger and put it in the middle. That will definitely fix your imbalance audio problem.
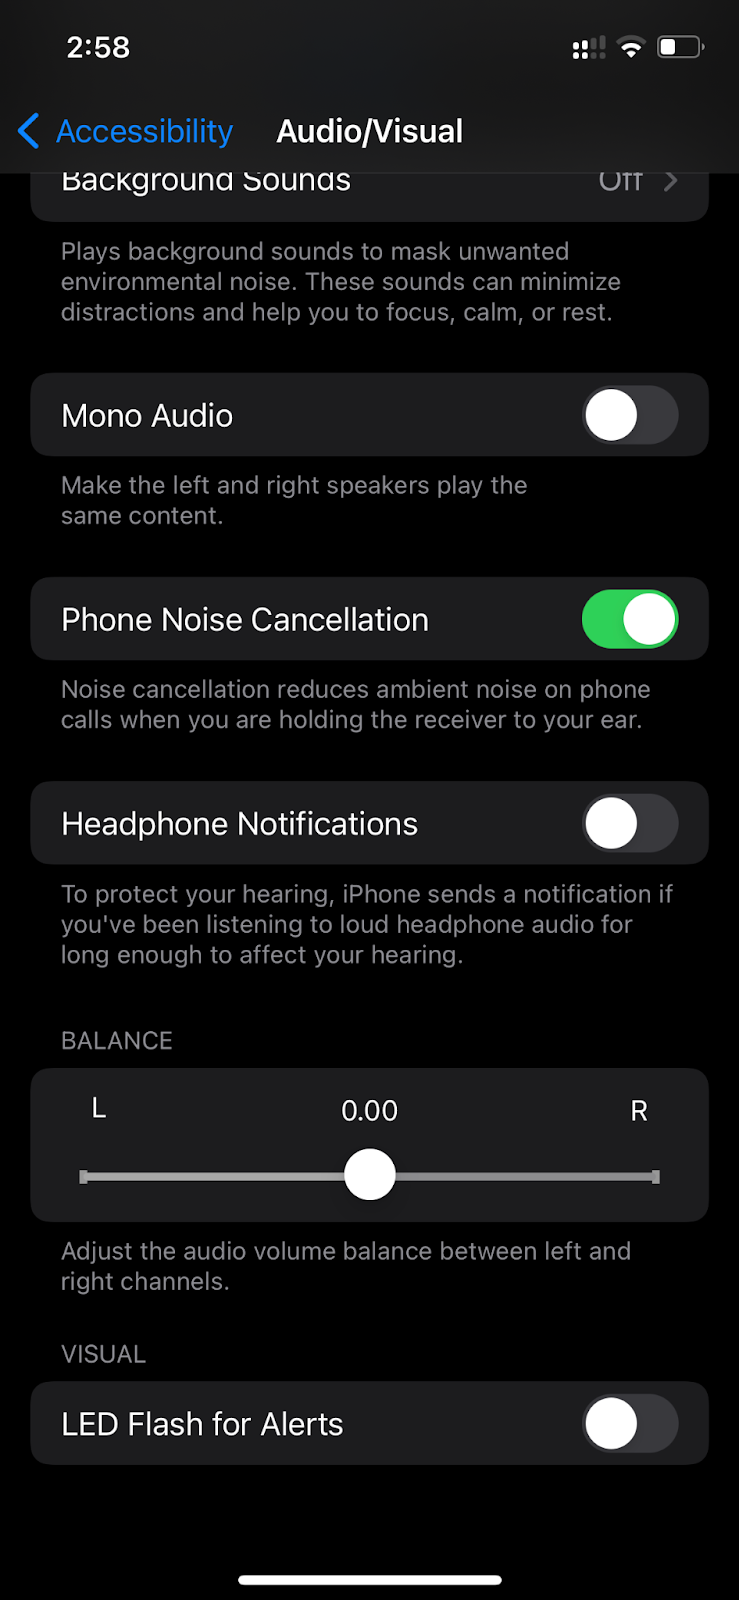
(iPhone Settings>Accessibility>Audio/Visual settings screen)
5. Try resetting your AirPods
If your audio is balanced and your AirPods are clean, maybe you should try resetting the AirPods. This solution may work, especially if it is due to a software and connection issue. Many users also found that resetting their AirPods seemed to fix problems with AirPods that don’t hold a charge. Here is how to reset your AirPods:
- Press and hold your charging case’s setup button and wait for the light to start flashing an amber color then turn to white
- Once the light starts flashing white, your AirPods are reset
- Reconnect your AirPods to your device by going into the Settings and tapping on Bluetooth Settings.
- From there, click on your icon next to your AirPods on the list of paired devices, then choose to forget device to reconnect your newly reset AirPods.
6. Calibrate AirPods
Not many people know about this solution because some of the solutions above mostly fix their AirPod issues. If none of the above worked for you, don’t lose hope and give into buying a new pair just yet. You just might need to recalibrate your AirPods using your iPhone to fix the problem. And here is how:
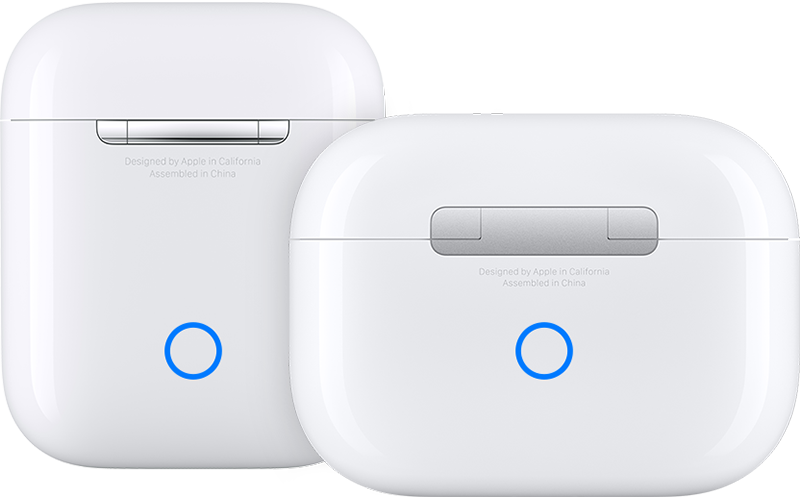
(AirPods and AirPods Pro Charging Cases)
- Step 1: Play music on your iPhone and start listening through your AirPods. Once the music is playing turn the volume level to zero using the volume buttons on your phone.
- Step 2: While your music is playing and the sound is at zero, disable Bluetooth in your control center but don’t remove the AirPods from your ears.
- Step 3: Begin playing music again, but the sound will now come out of your iPhone’s built-in speakers. Turn the volume down to zero once more.
- Step 4: Enable Bluetooth, and reconnect your AirPods to complete the calibration.
After the calibration, you can check to see if this quick fix resolved your AirPods issue. If not, move on to the next step.
7. Restart iPhone, iPad, or MacBook
If recalibrating, resetting, and reconnecting your AirPods did not fix the problem, maybe resetting and configuring your iPhone or iPad will.
To reconfigure an iPhone, just hold the power or lock button until the power slider appears on the screen. Slide the power slider right to turn off your iPhone or iPad. For MacBook users, just shut down the computer normally and turn it on again.
If All Else Fails, Visit Your Nearest Apple Store

If all these fixes still don’t fix your problem, now is the time you might need to visit an Apple Store to get a replacement, especially if your AirPods are still under warranty. If your warranty already expired, you can try getting new ones from certified Apple vendors like Costo, T-Mobile, and other phone companies at a probably much cheaper price.
Now as certified Apple and tech geniuses here at Gadget Gang, we still can’t avoid the possibility of not being able to fix your devices. But if it is a hardware issue or a damaged product, the best solution is to get a replacement.